Picture this: you’re halfway through a week of bland, store‑bought soups when your phone buzzes with a text from your foodie friend, “I just made the most epic chili—bet you can’t top it.” You’ve never even dared to cook a bean stew that could double as a meal, a side, and a late‑night snack. The kitchen lights flicker, the aroma of cumin and garlic hits your senses like a warm hug, and you’re suddenly the star of a culinary showdown. This is the moment that sparked a midnight experiment and turned a simple pantry into a flavor laboratory, and I’m about to spill every secret that made this chili the best thing you’ll ever taste.
I was staring at a can of beans, a jar of diced tomatoes, and a handful of spices, wondering if I could turn them into something that would make my friends gasp. I mixed the beans with a splash of olive oil, diced onions, and bell pepper, then let the aroma rise like a slow‑burning fire. The first sizzle was pure magic—those tiny bubbles dancing in the pan sounded like applause for an encore. I added chili powder, cumin, smoked paprika, and a pinch of oregano, and the kitchen filled with a scent that made my mouth water before the first bite. That first spoonful was a revelation: smoky, earthy, with a hint of sweetness that lingered on the tongue.
The secret? It’s not just the beans or the spices; it’s the way each component is coaxed into harmony. The beans are soaked overnight, releasing their starch to thicken the sauce naturally. The tomatoes are crushed, not pureed, giving the chili a robust texture that clings to the beans. The final splash of lime juice cuts through the richness, leaving a bright, refreshing finish that balances the heat. This version is a symphony of flavors that makes every bite feel like a new discovery, not a repetition. I dare you to taste this and not go back for seconds; the next bite will feel like a revelation.
What sets this chili apart is not just the taste—though it’s undeniably unforgettable—but the simplicity of the method, the depth of flavor, and the sheer versatility. The beans soak up every spice, creating a thick, hearty base that can be served over rice, mashed potatoes, or even baked into a casserole. The recipe is crowd‑pleasing; it’s the kind of dish that turns a casual dinner into a celebration. The ingredients are pantry staples, yet the flavor profile feels elevated and gourmet. I’ve refined this recipe over countless trials, and the final product is hands down the best version you’ll ever make at home. Let me walk you through every single step—by the end, you’ll wonder how you ever made it any other way.
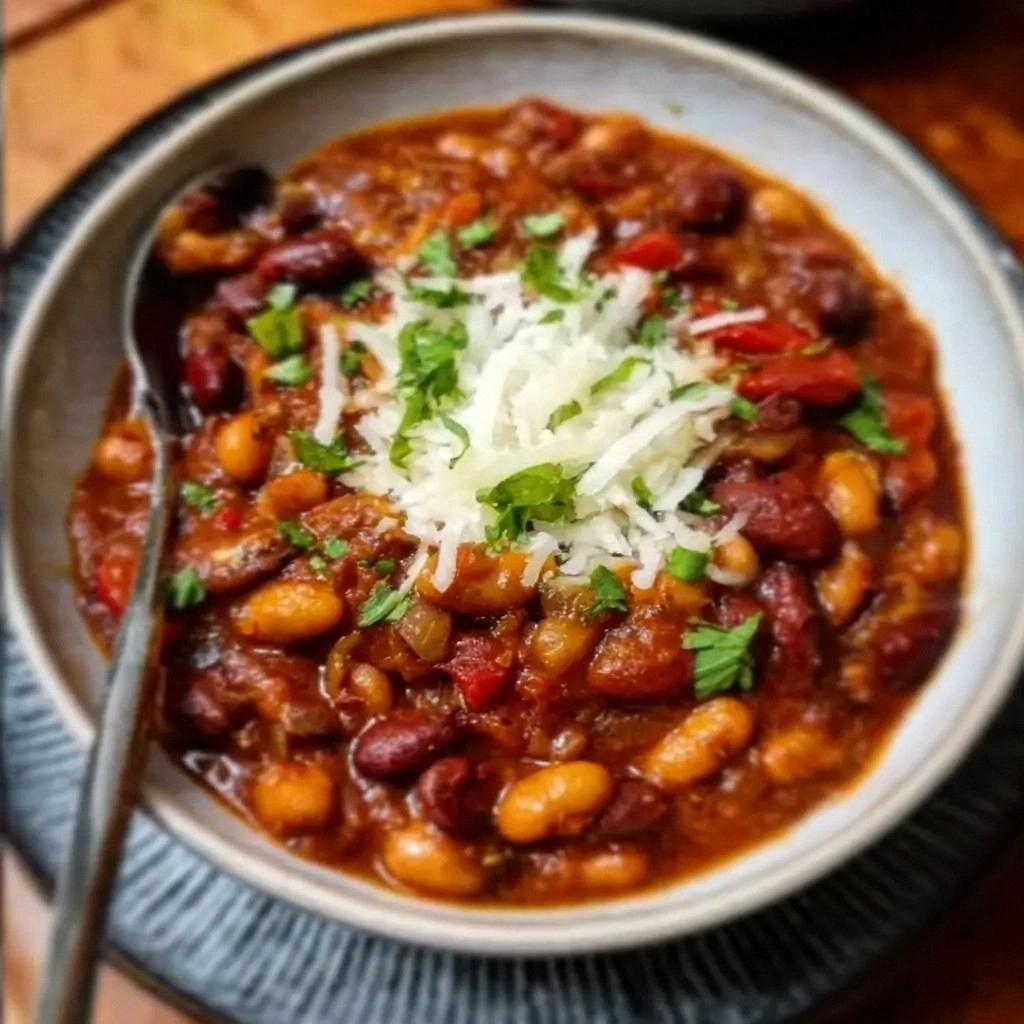
- Flavor: Each bean contributes a unique texture and taste, creating a complex, layered mouthfeel that feels both hearty and refined.
- Heat: The chili powder and cumin are balanced with a subtle sweetness from the tomatoes, ensuring the heat is bold but not overpowering.
- Texture: The beans remain firm yet tender, while the crushed tomatoes provide a silky sauce that coats every bite.
- Ease: The recipe requires minimal prep—just a quick soak, a handful of diced veggies, and a simmer that takes care of itself.
- Versatility: Serve it on its own, over rice, or as a filling for tacos; it adapts to any meal plan.
- Make‑ahead: The chili tastes even better the next day, making it perfect for busy weeknights.
- Nutrition: Packed with protein, fiber, and vitamins, it’s a wholesome, plant‑based powerhouse.
- Presentation: A sprinkle of cilantro and a squeeze of lime finish the dish with a pop of color and brightness.
Alright, let's break down exactly what goes into this masterpiece. The first step is to soak the beans, which not only softens them but also reduces cooking time and improves digestibility. I prefer a quick soak: bring the beans to a boil for 2 minutes, then let them sit for 30 minutes before draining. This method preserves the beans’ shape and flavor while still giving them a tender bite. The next step is the flavor base, where onions, bell pepper, and garlic sizzle in olive oil until they’re translucent and fragrant. This stage is crucial because it builds the aromatic foundation that carries the chili’s depth.
The Flavor Base
This group starts with the aromatics—onions, bell pepper, and garlic—sautéed until they’re golden and fragrant. The onions provide a subtle sweetness, the bell pepper adds a hint of crunch and a mild peppery note, and the garlic offers a sharp, earthy undertone. Skipping any of these will leave the chili feeling flat; the balance of sweet, savory, and aromatic is what lifts the dish. If you’re a fan of extra heat, add a pinch of cayenne or a diced jalapeño at this stage for a subtle kick.
The Texture Crew
Here we introduce the beans: black, kidney, and pinto. Each bean brings its own texture—black beans are creamy, kidney beans are hearty, and pinto beans offer a subtle nuttiness. Soaking them overnight (or using the quick method) ensures they cook evenly and absorb the spices. If you’re short on time, canned beans work, but be sure to rinse them to reduce excess sodium. The beans’ ability to hold their shape while absorbing liquid is what makes this chili so comforting.
The Unexpected Star
Corn, a small but mighty addition, adds a pop of sweetness and a pleasing crunch that contrasts the beans’ softness. Frozen corn is a convenient choice, and it keeps its bright color and flavor when cooked. Some people love to add a splash of maple syrup or a drizzle of agave to enhance the natural sweetness, especially if you’re aiming for a slightly dessert‑like finish. This little twist turns an ordinary bean stew into a memorable dish.
The Final Flourish
The finishing touches—lime juice, cilantro, and optional nutritional yeast—add brightness, depth, and a subtle umami note. Lime juice cuts through the richness, giving the chili a clean finish, while cilantro provides a fresh, herbal aroma that lingers. Nutritional yeast, though optional, adds a cheese‑like flavor and boosts the protein content. Together, these final ingredients transform the chili from simple to spectacular, ensuring every bite is a burst of flavor.
Everything's prepped? Good. Let's get into the real action and let the flavors mingle.
The Method — Step by Step
Step 1: In a large pot, heat the olive oil over medium heat until shimmering. Add the diced onion, bell pepper, and minced garlic, stirring frequently until the vegetables soften and become fragrant, about 5 minutes. The mixture should look translucent, not browned, and the aroma should be unmistakably savory. This is the base that will carry all the spices and beans. If you notice any excess water, let it evaporate to avoid a watery chili.
Step 2: Sprinkle in the chili powder, cumin, smoked paprika, oregano, coriander, salt, and pepper. Stir constantly for 1 minute to toast the spices, releasing their oils and deepening their flavor. The kitchen should fill with a warm, earthy scent that makes your stomach growl. Watch the spices not to burn—just a quick toast is enough. This step is critical; the right spice balance is what makes the chili unforgettable.
Step 3: Add the soaked beans, crushed tomatoes, and vegetable broth. Stir until everything is well combined, then bring the mixture to a gentle simmer. Reduce the heat to low, cover the pot, and let it cook for 45 minutes, stirring occasionally. The beans should be tender and the liquid thickened into a hearty stew. If the chili starts to dry out, add a splash of broth or water to keep it moist.
Step 4: Stir in the maple syrup and maple syrup, if using, to balance the acidity of the tomatoes. The subtle sweetness will round out the chili, making it more complex. Taste and adjust the seasoning—add more salt or a pinch of cayenne if you prefer heat. This is the moment of truth; the flavors should mingle seamlessly. The chili should now have a thick, glossy texture.
Step 5: Reduce the heat to low and let the chili simmer for another 15 minutes, uncovered, allowing the flavors to meld. The liquid should reduce slightly, concentrating the taste. At this point, the chili should smell like a warm, comforting hug. If you notice any bitterness, a splash of lime juice can help. This step is essential for depth, so don't skip it.
Step 6: Turn off the heat and stir in the lime juice and chopped cilantro. The lime juice brightens the chili, while the cilantro adds a fresh, herbal note. Let the chili sit for 5 minutes so the flavors can settle. This resting period allows the lime to meld with the spices, creating a balanced finish. The aroma should be vibrant and inviting.
Step 7: If you’re serving the chili immediately, ladle it into bowls and top with a drizzle of olive oil, a sprinkle of nutritional yeast, or a dollop of Greek yogurt. These toppings add richness and a creamy contrast. If you prefer a dairy‑free option, a splash of coconut cream works beautifully. The chili should look glossy, with beans glistening in the sauce. This step is where the dish truly shines.
Step 8: Serve hot over rice, quinoa, or mashed potatoes, or enjoy it on its own as a hearty stew. Pair it with a side of cornbread or a fresh salad for a complete meal. The chili is also excellent for next‑day leftovers; the flavors deepen over time. If you’re cooking for a crowd, double the recipe and keep it warm in a slow cooker. The result is a crowd‑pleasing, comforting dish that feels both homey and gourmet.
Step 9: For an extra burst of flavor, add a spoonful of tomato paste during the simmering process. This will thicken the sauce and intensify the tomato taste. It also adds a subtle sweetness that balances the spices. The chili will have a richer, more robust flavor profile. This trick is perfect for those who love a deeper, more complex taste.
Step 10: Finally, taste the chili one last time and adjust any seasoning. If it needs more salt, add a pinch at a time. If you want more heat, sprinkle a bit more chili powder or cayenne. The goal is a balanced, flavorful, and comforting dish that satisfies. Once satisfied, serve and enjoy the masterpiece you’ve created.
That's it—you did it. But hold on, I've got a few more tricks that'll take this to another level. These insider tips will help you perfect the chili and avoid common pitfalls.
Insider Tricks for Flawless Results
The Temperature Rule Nobody Follows
Many people think simmering at high heat is fine, but it can scorch the beans and flatten the flavors. Keep the heat low and let the chili gently bubble for the full cooking time. This slow, steady method allows the spices to fully infuse the beans and the tomatoes to break down into a silky sauce. I once tried a high‑heat approach and the chili turned out watery and bland—lesson learned. Stick to low heat, and you’ll get a richer, more cohesive dish.
Why Your Nose Knows Best
Trust your nose when the chili is cooking. A faint, sweet aroma means the tomatoes are breaking down properly, while a sharp, burnt smell indicates you’re over‑cooking. The smell is often a better indicator than the clock. If you notice a metallic scent, it could mean your pot is reacting with the spices. Smell your way through, and you’ll achieve a perfect balance.
The 5‑Minute Rest That Changes Everything
After turning off the heat, let the chili rest for 5 minutes before serving. This brief pause allows the flavors to settle and the beans to absorb the remaining liquid. It also gives the spices a chance to mellow, resulting in a more rounded taste. I’ve found that skipping this rest often leaves the chili feeling sharp and underdeveloped. Give it that short break, and you’ll notice a noticeable difference.
Add a Splash of Acid
Lime juice is a game changer, but you can also use vinegar for a different twist. A splash of apple cider or red wine vinegar adds brightness and cuts through the richness. Just a tablespoon is enough to lift the flavor profile. Some people love the tangy kick, while others prefer the citrusy note of lime. Experiment and find your favorite.
Use Fresh Beans When Possible
Freshly soaked beans give a better texture and flavor than canned. They’re less likely to become mushy and have a cleaner taste. If you’re in a rush, use canned beans, but rinse them well to remove excess sodium. I’ve found that fresh beans make the chili feel more authentic and satisfying. Give it a try and see the difference.
Heat It Right for Leftovers
When reheating leftovers, add a splash of water or broth to keep the chili moist. Warm it slowly over low heat, stirring frequently to prevent sticking. A quick microwave can dry it out, so I prefer the stove for the best texture. The chili tastes even better the next day because the flavors have had time to marry. This method keeps it delicious and comforting.
Now that you have the insider tricks, you’re ready to make a chili that will wow your friends and family.
Creative Twists and Variations
This recipe is a playground. Here are some of my favorite ways to switch things up:
Mexican Street‑Taco Chili
Serve the chili in soft corn tortillas with diced avocado, shredded lettuce, and a squeeze of lime. Add a dollop of salsa verde for extra heat. The combination of textures and flavors feels like a street‑food fiesta. It’s perfect for a quick, satisfying dinner that feels like a culinary adventure. The bright, fresh toppings contrast the hearty chili beautifully.
Indian‑Inspired Curry Chili
Swap the cumin and chili powder for garam masala, coriander, and turmeric. Add a splash of coconut milk toward the end for richness. Serve over basmati rice and garnish with fresh cilantro. The spices give the chili a warm, aromatic profile reminiscent of a comforting curry. It’s a fusion that’s both exotic and familiar.
Sweet Potato & Black Bean Chili
Dice a sweet potato and add it to the pot at the same time as the beans. The sweet potato adds natural sweetness and a silky texture. This variation is great for a fall or winter meal, offering a comforting, earthy flavor. The sweet potato also boosts the nutritional profile with beta‑carotene. The result is a chili that feels cozy and hearty.
Cheese Lover’s Chili
Top the finished chili with shredded cheddar or Monterey Jack, then place it under the broiler for a minute until bubbly. The melted cheese creates a gooey, indulgent topping that pairs perfectly with the spicy beans. Sprinkle with chives for a touch of color and freshness. This version feels like a comfort‑food classic with a twist. It’s a crowd‑pleaser for any occasion.
Vegan Taco Bowl
Serve the chili over quinoa or brown rice and top with sliced avocado, diced tomatoes, and a drizzle of cashew cream. Add a sprinkle of nutritional yeast for a cheesy flavor. The protein‑rich quinoa and creamy cashew sauce make this bowl satisfying and wholesome. It’s a plant‑based delight that satisfies both the taste buds and the body. The bowl is colorful and full of texture.
Spicy Garlic Chili
Increase the garlic to 6 cloves and add a pinch of crushed red pepper flakes. Let the garlic caramelize slightly for a deeper flavor. This version is perfect for garlic lovers who want an extra kick. The heat from the flakes complements the earthy beans. The result is a bold, aromatic chili that’s hard to forget.
Storing and Bringing It Back to Life
Fridge Storage
Store leftovers in an airtight container in the refrigerator for up to 4 days. The chili will thicken as it cools, so add a splash of broth or water before reheating to restore its original consistency. This method keeps the beans tender and the sauce flavorful. Keep the container sealed to avoid absorbing odors from other foods. The chili remains delicious and safe to eat.
Freezer Friendly
Freeze the chili in portioned containers for up to 3 months. Thaw overnight in the refrigerator or use the defrost setting on your microwave. Reheat on the stovetop over low heat, stirring frequently. Adding a bit of water or broth helps maintain moisture. This makes it easy to have a ready‑to‑cook meal for busy days.
Best Reheating Method
The best way to reheat chili is on the stovetop over low heat, stirring occasionally. This allows the beans to heat evenly and the sauce to thicken without scorching. If you’re in a hurry, use a microwave on medium power, stirring every 30 seconds. Finish with a splash of water or broth for a silky finish. This method keeps the chili tasting fresh and vibrant.
Now you’re armed with everything you need to create a chili that’s as impressive as it is comforting. Whether you’re cooking for one or a crowd, this recipe will shine.