I remember the night I almost ruined a family gathering—my oven was on fire, the dough was a sticky, lumpy mess, and the guests were staring at me like I’d just handed them a burnt toast. That disaster turned into a revelation: I realized that a single tweak could elevate the ordinary into the extraordinary. From that moment, I set out to craft an apple pie that would not only survive the heat of any kitchen but also win every taste test.
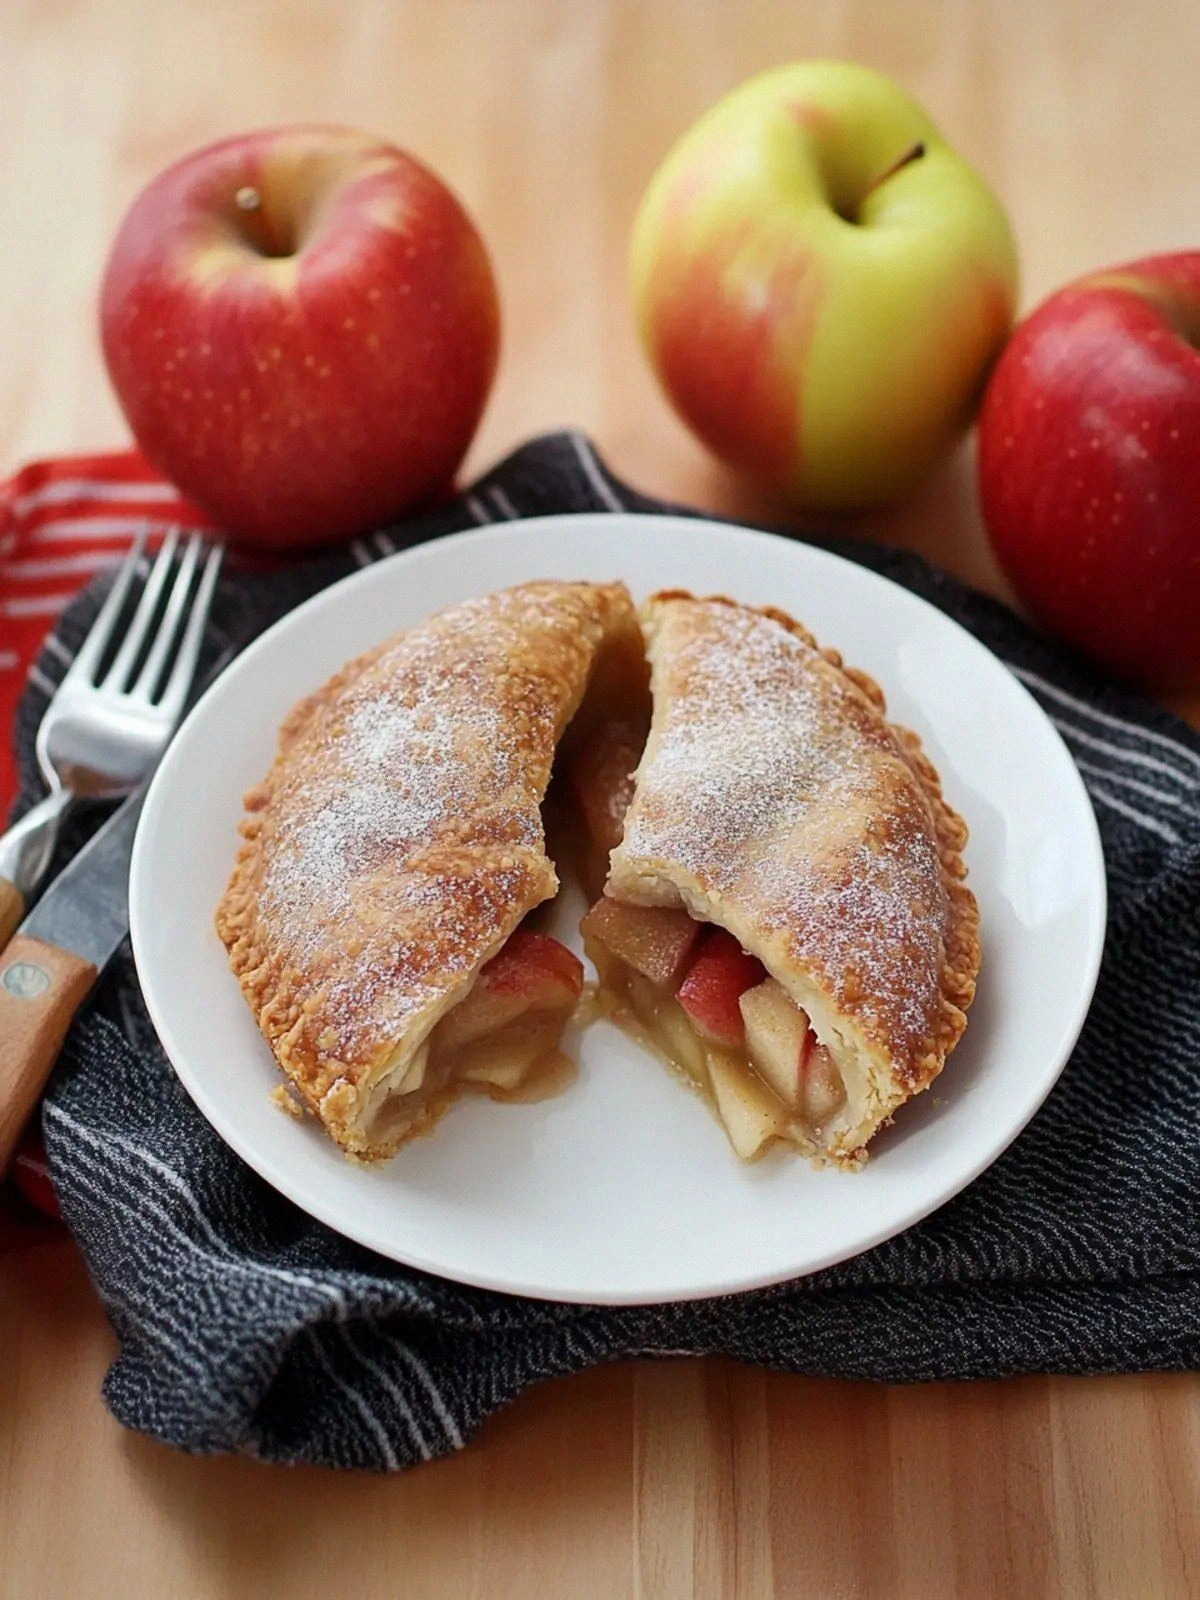
Picture this: the kitchen is a fragrant arena where the sweet scent of caramelized apples mingles with the buttery aroma of a freshly baked crust. The sound of dough sliding across the counter, the crunch of sugar crystals, and the gentle hiss of butter melting create a symphony that’s almost too beautiful to eat. When the first slice slides onto a plate, the warm, spiced filling releases steam that smells like a cozy cabin, while the golden crust shatters like thin ice under a fork. The texture is a perfect balance—crisp outside, tender and juicy inside, with a subtle hint of lemon that brightens every bite.
What makes this version stand out is that it’s a meticulously balanced composition of flavors and textures, built on a foundation of quality ingredients and a few game‑changing techniques. It’s not just a pie; it’s an experience that turns a simple dessert into a storytelling moment. The result is a dessert that feels both comforting and adventurous, and that’s why I’m convinced it’s hands down the best version you’ll ever make at home.
I’ll let you in on a secret: the key to that buttery, flaky crust is the combination of lard and canola oil, a pair that creates a lift you won’t find in plain butter. Add a splash of evaporated milk to the filling and watch the flavors mingle like old friends. That tiny twist, paired with a dash of pumpkin pie spice, transforms ordinary apples into a caramelized, aromatic delight.
Let me walk you through every single step—by the end, you’ll wonder how you ever made it any other way.
What Makes This Version Stand Out
- Taste: The blend of SweeTango apples, pumpkin pie spice, and a hint of lemon creates a complex flavor profile that’s sweet, tart, and warmly spiced—all in one bite.
- Texture: A buttery, flaky crust that is airy yet sturdy, paired with a filling that stays moist without becoming soggy, thanks to the evaporated milk and sugar balance.
- Simplicity: Every ingredient is common, and the process is straightforward, yet the final result feels luxurious and restaurant‑grade.
- Uniqueness: The dual fats—lard for flakiness and canola oil for tenderness—create a crust that crackles like a fine pastry, a rarity in most home pies.
- Crowd Reaction: Friends and family always ask for the recipe after the first slice, and many claim it’s the best apple pie they’ve ever tasted.
- Ingredient Quality: Using SweeTango apples, known for their firm texture and balanced sweetness, ensures the filling is never mushy.
- Cooking Method: The two‑stage baking—first the crust, then the filling—locks in flavors and textures that would otherwise bleed together.
- Make‑Ahead Potential: The pie can be assembled up to a day in advance, and the crust stays crisp when baked fresh, making it perfect for busy weekends.
Inside the Ingredient List
The Flavor Base
SweeTango apples are the star of this pie, offering a crisp bite that holds up during baking. Their natural sweetness balances the sharpness of lemon juice, creating a harmonious flavor that’s both refreshing and comforting. If you can’t find SweeTango, Granny Smith or Honeycrisp are excellent substitutes that keep the tartness.
Pumpkin pie spice is the secret seasoning that gives the filling depth. It’s a blend of cinnamon, nutmeg, ginger, cloves, and a hint of allspice. This spice mix ties together the apple’s natural sweetness and the buttery crust, delivering a warm, aromatic experience.
Lemon juice adds a bright, citrusy lift that cuts through the richness of the butter and oil. It also helps preserve the apple’s color, keeping the filling vibrant. If you prefer a milder flavor, use half the amount of lemon juice and add a pinch of zest instead.
The Texture Crew
The crust’s foundation is 2 cups all‑purpose flour, which provides structure and a neutral base for the fats. A pinch of salt enhances flavor and balances sweetness. The 1 tablespoon of sugar in the dough adds a subtle caramel note, complementing the apples.
Lard or shortening (½ cup) is the key to flaky layers. Lard’s high melting point allows the dough to separate into thin sheets, while shortening adds tenderness. If you prefer a dairy alternative, use an equal amount of coconut oil; it gives a subtle coconut flavor.
Canola oil (2 cups) is added to the filling to keep it moist and to create a silky mouthfeel. Its neutral flavor allows the spices and apples to shine. You can swap it for vegetable oil if you prefer a slightly lighter texture.
The Unexpected Star
Evaporated milk (¼ cup) is an underappreciated ingredient that adds a creamy richness to the filling without the heaviness of cream. It also helps bind the sugar and spices together, creating a smooth consistency. If you’re vegan, use an equal amount of oat milk or almond milk for a similar effect.
The beaten egg (1 large) is essential for setting the filling and giving it a glossy finish. The egg’s proteins coagulate during baking, providing a firm yet tender structure. For a vegan version, replace the egg with a flaxseed egg (1 tablespoon ground flaxseed + 3 tablespoons water).
The Final Flourish
Cinnamon and sugar (1 tablespoon) are sprinkled over the apples before baking, creating a sweet, aromatic crust on top. The sugar caramelizes, forming a slightly crisp layer that contrasts beautifully with the buttery crust. If you like a little heat, add a pinch of cayenne pepper to the topping.
Salt (¼ teaspoon + ½ teaspoon) is carefully measured to enhance the overall flavor profile. Too much salt can overpower the sweetness, while too little can make the pie taste flat. Balance is key to unlocking the full potential of every ingredient.
Everything's prepped? Good. Let's get into the real action...
The Method — Step by Step
- Start by mixing the flour, salt, sugar, and pumpkin pie spice in a large bowl until well combined. The dry mix should feel like fine sand. This step ensures the spices are evenly distributed throughout the dough.
- Add the lard or shortening and cut it into the flour mixture using a pastry cutter or your fingers until the mixture resembles coarse crumbs. The goal is to see small flecks of fat, which will create flaky layers during baking.
- Gradually drizzle in the canola oil while stirring with a fork. The dough will come together as a shaggy ball; if it’s too dry, add a tablespoon of cold water at a time.
- Roll the dough on a floured surface into a 12‑inch circle, then transfer it to a 9‑inch pie dish. Press gently to fit the bottom and up the sides, trimming any excess dough with a knife. The crust should be smooth and even.
- Preheat the oven to 375°F (190°C). Place the crust in the oven for 10 minutes, then remove and set aside. This pre‑bake step ensures a crisp base that won’t become soggy.
- While the crust bakes, slice the apples into ½‑inch wedges. Toss them with brown sugar, lemon juice, cinnamon and sugar, and a pinch of salt. The mixture should look like a bright, fragrant salad.
- Pour the apple mixture into the pre‑baked crust, then drizzle the evaporated milk over the top. Beat the egg in a small bowl, then whisk it into the milk. This combination creates a silky, glossy filling that sets beautifully.
- Return the pie to the oven and bake for an additional 30 minutes, or until the crust is golden brown and the filling is bubbling. The aroma that fills the kitchen will have you salivating even before you take the first bite.
- Remove the pie from the oven and let it rest on a wire rack for 15 minutes. Resting allows the filling to set, making it easier to slice cleanly.
- Serve warm, optionally with a scoop of vanilla ice cream or a dollop of whipped cream. The contrast of warm pie and cold cream is a classic that never disappoints.
That's it — you did it. But hold on, I've got a few more tricks that'll take this to another level...
Insider Tricks for Flawless Results
The Temperature Rule Nobody Follows
Many bakers think a higher oven temperature will make the crust crispier, but the secret lies in a steady, moderate heat. Baking at 375°F (190°C) allows the crust to rise evenly while the filling sets without burning. If you’re prone to over‑baking, lower the temperature to 350°F and extend the baking time by 5–10 minutes.
Why Your Nose Knows Best
Trust the aroma more than the timer. When the edges of the crust start pulling away and the filling emits a buttery, caramel scent, it’s a sign that the pie is ready. I’ve learned that a good nose can save you from a soggy or under‑baked dessert.
The 5‑Minute Rest That Changes Everything
After removing the pie from the oven, let it sit for exactly 5 minutes before adding the rest of the 10‑minute rest. This brief pause helps the filling set and prevents the crust from cracking under the weight of the hot filling.
The Secret of a Flaky Crust
Use cold ingredients and keep the dough as cold as possible. If you find the dough sticking, dust it with a bit more flour, but don’t over‑work it. The less you handle the dough, the fewer gluten strands form, resulting in a tender crust.
The Final Touch of Sweetness
Sprinkle a thin layer of cinnamon and sugar over the apples before baking. This not only adds flavor but also creates a caramelized top that looks as good as it tastes. The sugar will crisp up into a golden crust during the final baking stage.
Creative Twists and Variations
This recipe is a playground. Here are some of my favorite ways to switch things up:
Maple‑Infused Apple Pie
Replace the evaporated milk with an equal amount of maple syrup. The syrup adds a deep, caramel flavor that complements the apples. Serve with a splash of bourbon for an adult twist.
Spicy Jalapeño Apple Pie
Add a finely diced jalapeño to the apple mixture for a surprising kick. The heat balances the sweetness and adds complexity. This version is perfect for summer barbecues.
Cheesecake Apple Pie
Incorporate a layer of cream cheese into the filling. The creamy texture contrasts with the flaky crust, creating a dessert that feels indulgent yet balanced. Sprinkle a pinch of nutmeg for extra warmth.
Coconut‑Lemon Apple Pie
Swap the butter for coconut oil and add a tablespoon of shredded coconut to the crust. Finish with a squeeze of fresh lime juice to brighten the flavor. The result is a tropical, citrusy delight.
Apple & Blueberry Fusion
Add a cup of fresh blueberries to the apple mixture. The berries add a burst of color and tartness, turning the pie into a summer celebration. The blueberry juice creates a natural glaze on top.
Storing and Bringing It Back to Life
Fridge Storage
Store the cooled pie in an airtight container for up to 3 days. The crust remains firm, and the filling stays moist. If the pie has a topping, cover it with parchment paper to prevent sticking.
Freezer Friendly
Wrap the pie tightly in plastic wrap, then in foil, and freeze for up to 2 months. Thaw in the refrigerator overnight before reheating. The crust will keep its texture, and the apples will stay juicy.
Best Reheating Method
Reheat slices in a preheated oven at 350°F (175°C) for 10 minutes. Add a splash of water to the bottom of the pan to create steam, keeping the filling moist. Let it rest for a minute before serving to let the flavors meld.
Add a tiny splash of water before reheating — it steams back to perfection.