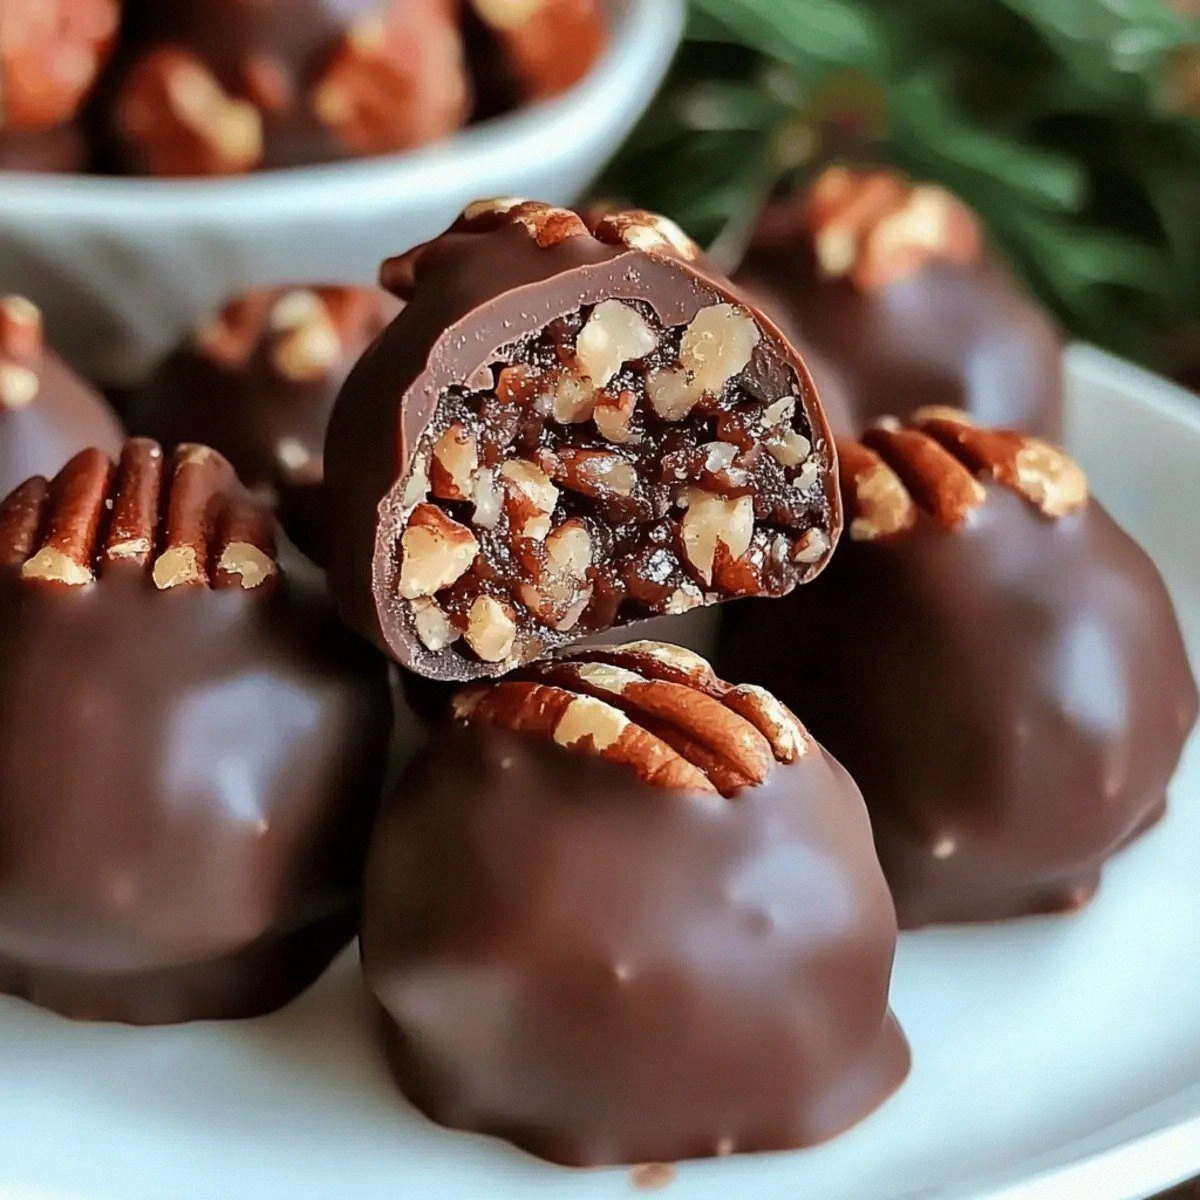
Picture this: you’re in the middle of a chaotic Thanksgiving prep, the turkey’s fighting for space in the oven, the cranberry sauce is bubbling like a volcanic eruption, and you realize you’ve completely forgotten dessert. I was standing there, half‑panicked, half‑laughing, when a friend dared me to reinvent the classic pecan pie in bite‑size form. I stared at the pantry, grabbed a handful of pecans, and thought, “What if I could compress all that caramel‑nut goodness into a single, melt‑in‑your‑mouth sphere?” That thought turned into an obsession, and after a few trial runs (including one disastrous batch that turned into a sticky brick), I finally nailed the perfect balance of buttery crust, rich chocolate, and that unmistakable maple‑kissed pecan crunch.
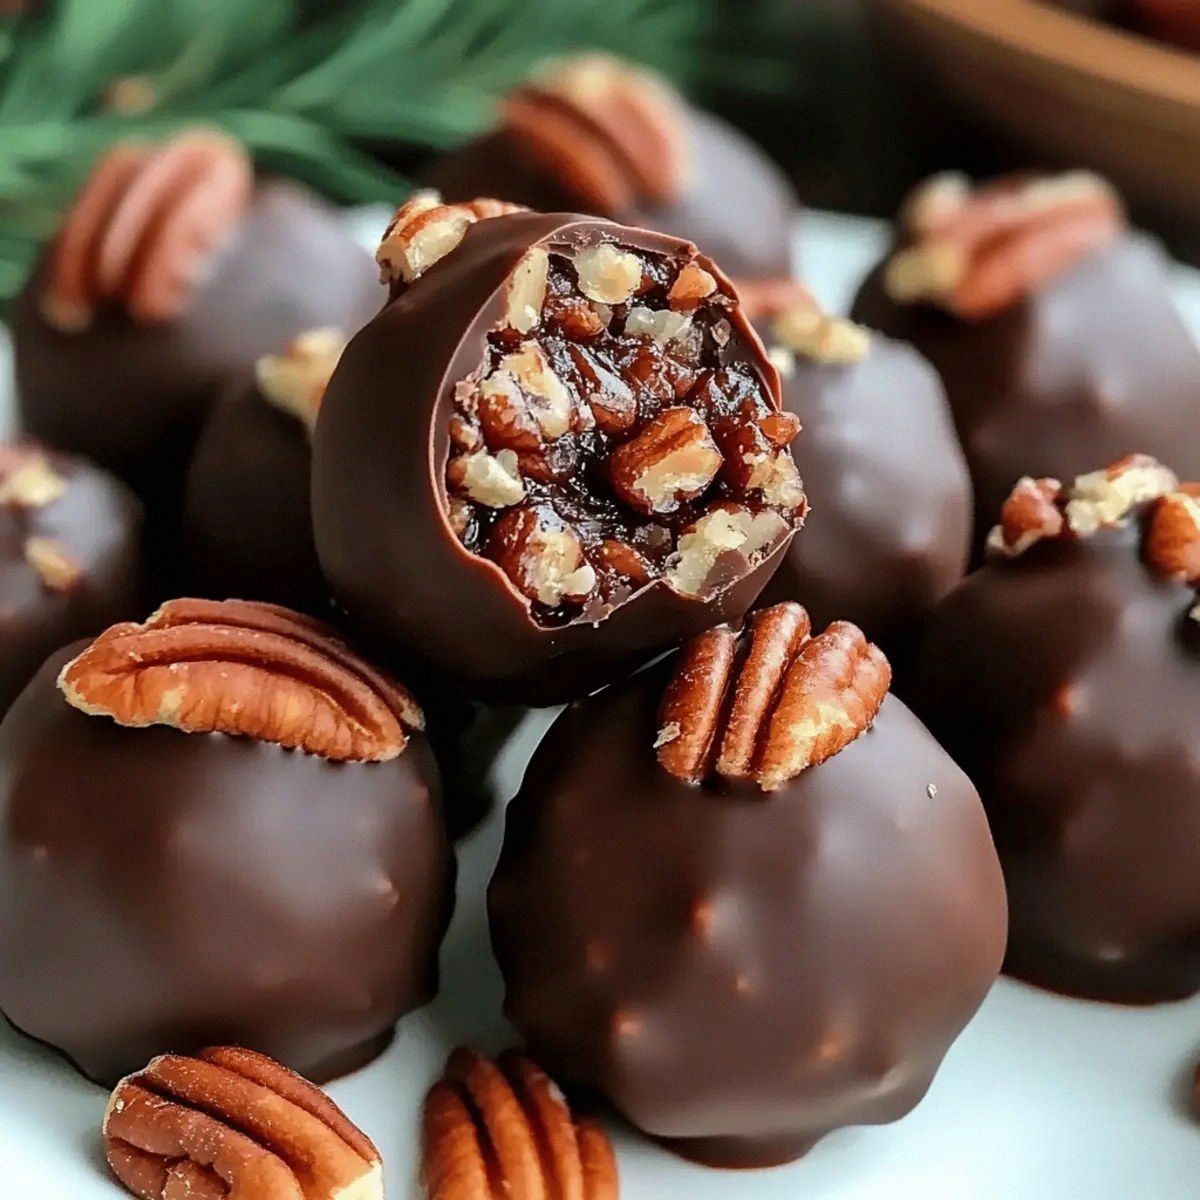
The moment those balls hit the baking sheet, the kitchen filled with a perfume that could convince even the most disciplined dieter to surrender. You’ll hear the gentle sizzle as the butter and sugar melt together, see the edges turn a deep amber, and feel the anticipation building as the chocolate chips start to melt into glossy rivers. When you bite into one, the outer shell cracks like a delicate shell of caramel, giving way to a silky interior that coats your tongue like velvet, while the toasted pecans provide a satisfying crunch that sings in perfect harmony with the chocolate. It’s a sensory roller coaster that makes you gasp, grin, and immediately reach for another.
Most pecan pie recipes either drown you in syrup or leave you with a soggy crust that collapses under its own weight. This version, however, flips the script by using a blend of graham cracker crumbs and cocoa‑infused butter to create a sturdy yet tender base that holds its shape without turning gummy. The secret weapon? A splash of maple syrup that adds depth without overwhelming sweetness, and a final coating of extra chopped pecans that give each bite that satisfying snap. I dare you to taste this and not go back for seconds; it’s honestly the best version you’ll ever make at home.
And now, the game‑changer: we’re going to fold in semi‑sweet chocolate chips at just the right moment, allowing them to melt just enough to bind the mixture without losing their glossy allure. This tiny twist transforms a simple dessert into a luxurious treat that feels like a bite of holiday magic any day of the year. Let me walk you through every single step — by the end, you’ll wonder how you ever made it any other way.
What Makes This Version Stand Out
- Texture: The outer crust is crisp yet buttery, while the interior stays soft and gooey, creating a contrast that makes each bite unforgettable.
- Flavor Depth: A hint of unsweetened cocoa adds a subtle bitterness that balances the maple’s natural sweetness, delivering a complex palate.
- Simplicity: Only ten ingredients, all pantry‑friendly, and no fancy equipment—just a mixing bowl, a spoon, and a baking sheet.
- Uniqueness: The combination of graham cracker crumbs with cocoa powder is a secret that most recipes overlook, giving these balls their signature bite.
- Crowd Reaction: Guests invariably ask for the recipe on the spot, and the “I ate half the batch before anyone else got a chance” confession becomes a running joke.
- Ingredient Quality: Using fresh, unsalted butter and pure maple syrup elevates the overall taste, turning a simple snack into a gourmet experience.
- Cooking Method: Baking at a moderate temperature ensures the nuts toast evenly without burning, while the chocolate sets perfectly.
- Make‑Ahead Potential: These balls store beautifully, making them ideal for party prep or a quick indulgent bite later.
Inside the Ingredient List
The Flavor Base
The graham cracker crumbs act as the silent hero, providing a subtle honey‑like sweetness and a crumbly texture that absorbs the butter without turning soggy. If you swap them for crushed vanilla wafers, you’ll get a vanilla‑forward flavor, but you’ll lose that rustic undertone that makes the final bite feel home‑y. Choose a brand that lists whole grain flour for a slightly nuttier profile; the extra fiber helps the mixture hold together.
The Texture Crew
Pecans are the star here. Their buttery richness and natural oil content give the balls their signature crunch. For the best result, opt for raw, unsalted pecans and give them a quick toast in a dry skillet—just until they release a fragrant, toasty aroma. If you’re allergic to nuts, try toasted pumpkin seeds; they mimic the crunch but with a milder flavor.
The Unexpected Star
Unsweetened cocoa powder adds depth without extra sugar, turning the crust from plain to sophisticated. It also gives the balls a dark, elegant hue that looks stunning on a plate. If you prefer a lighter color, you can halve the cocoa and replace the rest with extra graham crumbs, but you’ll miss the subtle bitter edge that balances the maple.
The Final Flourish
Semi‑sweet chocolate chips melt into a glossy river that binds everything together while still offering pockets of pure chocolate goodness. The extra chopped pecans sprinkled on top just before baking provide a final layer of crunch that makes the exterior snap like a caramelized shell. If you love extra chocolate, feel free to increase the chips by a quarter cup—just keep an eye on the baking time to avoid over‑softening.
Everything's prepped? Good. Let's get into the real action...
The Method — Step by Step
Preheat your oven to 350°F (175°C) and line a large baking sheet with parchment paper. While the oven warms, gather all dry ingredients—pecans, graham cracker crumbs, powdered sugar, and cocoa powder—into a large mixing bowl. This is the moment of truth: you’ll notice the cocoa darkening the mixture, creating an inviting chocolate‑brown canvas.
In a saucepan over low heat, melt the unsalted butter with the maple syrup, stirring constantly. Once the butter is fully melted and the syrup starts to bubble, remove from heat and let it cool for about two minutes. This cooling step is crucial; if the mixture is too hot, it will melt the chocolate later, ruining the texture.
Pour the warm butter‑maple mixture over the dry ingredients, adding the vanilla extract and salt. Stir vigorously until everything is fully combined and the mixture feels like a cohesive, slightly sticky dough. At this point, the aroma of toasted butter and maple should be filling the kitchen—trust your nose, it’s your best guide.
Fold in the semi‑sweet chocolate chips, letting them melt just enough to become glossy but not fully liquid. This is the delicate balance: the chips should stay in small pockets, creating bursts of chocolate when you bite. If you notice the mixture becoming too wet, sprinkle in an extra tablespoon of graham crumbs.
Using a tablespoon or a small ice‑cream scoop, portion out the dough onto the prepared baking sheet, spacing them about an inch apart. Gently press each mound into a ball shape, then roll each ball in the extra chopped pecans, ensuring an even coating. The pecan coating should cling like a light dusting of snow on a hill.
Slide the sheet into the preheated oven and bake for 12‑15 minutes, or until the edges turn a deep golden brown and the centers feel set to the touch. You’ll hear a faint crackling sound as the outer shell hardens—that’s the sound of perfection.
Remove the balls from the oven and let them cool on the sheet for five minutes before transferring to a wire rack. This short rest allows the interior to firm up while the outer crust remains crisp. If you’re impatient (like me), resist the urge to taste them immediately; the flavors need a moment to settle.
Once completely cooled, store the balls in an airtight container. They’ll stay fresh for up to three days at room temperature, or you can freeze them for up to a month. When you’re ready to serve, pop a few in the microwave for 10‑15 seconds to revive that melt‑in‑your‑mouth magic.
That's it — you did it. But hold on, I've got a few more tricks that'll take this to another level...
Insider Tricks for Flawless Results
The Temperature Rule Nobody Follows
Never bake these balls on a cold baking sheet; a warm sheet can cause the butter to melt too quickly, leading to a soggy bottom. Always start with a room‑temperature sheet, and if you want an extra crisp edge, pre‑heat the sheet for a minute before placing the dough. I once tried skipping this step and ended up with a mushy mess—lesson learned.
Why Your Nose Knows Best
When the butter‑maple mixture starts to emit a nutty, caramel aroma, you’re at the sweet spot. If the scent turns bitter, you’ve over‑cooked the butter, and the flavor will be off. Trust your sense of smell more than a timer; it’s the most reliable indicator of flavor development.
The 5‑Minute Rest That Changes Everything
Allowing the baked balls to rest on a wire rack for five minutes before packaging lets steam escape, preserving the crisp crust. Skipping this step results in a slightly soggy exterior because the moisture gets trapped underneath. I once served them straight from the tray, and the texture was disappointing—now I never forget the rest.
Chocolate Timing Precision
Add the chocolate chips when the butter‑maple mixture is warm, not hot. Too hot and the chips melt completely, losing their pocket‑like bursts; too cool and they won’t bind. This precise timing creates that delightful contrast of molten chocolate and firm crust.
The Salt Balance Trick
A pinch of sea salt on top of each ball right after baking amplifies the sweetness and accentuates the nutty flavor. It’s a tiny detail that makes professional pastry chefs smile. If you’re watching sodium intake, use a light dusting rather than a heavy sprinkle.
Freezing Without Losing Texture
Wrap each ball individually in parchment before placing them in a zip‑top bag; this prevents freezer burn and keeps the outer coating crisp. When you’re ready to enjoy them, let them thaw at room temperature for ten minutes, then give them a quick microwave zap. The texture stays as if they were freshly baked.
Creative Twists and Variations
This recipe is a playground. Here are some of my favorite ways to switch things up:
Spiced Pumpkin Delight
Replace half of the maple syrup with pumpkin puree and add a teaspoon of pumpkin pie spice. The result is a autumn‑inspired bite that pairs beautifully with a dollop of whipped cream.
Salted Caramel Swirl
Drizzle a thin ribbon of homemade salted caramel over the balls before the final pecan coating. The salty caramel adds a luxurious layer that makes each mouthful feel like a decadent dessert bar.
Mocha Madness
Swap half of the cocoa powder for finely ground espresso and add a splash of coffee liqueur to the butter‑maple mixture. The coffee notes deepen the chocolate flavor, turning the treat into a sophisticated after‑dinner bite.
White Chocolate Cranberry Burst
Use white chocolate chips instead of semi‑sweet and fold in dried cranberries. The tartness of the cranberries cuts through the richness, creating a balanced flavor profile perfect for holiday gatherings.
Nut‑Free Coconut Crunch
Replace pecans with toasted coconut flakes and use almond flour in place of graham crumbs for a gluten‑free version. The coconut adds a tropical twist that’s surprisingly complementary to the chocolate.
Storing and Bringing It Back to Life
Fridge Storage
Place the cooled balls in an airtight container lined with parchment paper. They’ll stay fresh for up to three days, and the cool environment keeps the chocolate from blooming. If you notice a slight softening, pop them in the microwave for 5 seconds to re‑crisp.
Freezer Friendly
Wrap each ball individually in parchment, then seal them in a zip‑top freezer bag. They can be frozen for up to a month without losing texture. When ready to serve, let them thaw at room temperature, then give them a quick 10‑second zap in the microwave to revive the melt‑in‑your‑mouth quality.
Best Reheating Method
To bring back that fresh‑baked crunch, place the balls on a microwave‑safe plate, add a tiny splash (about a teaspoon) of water to the plate, and microwave for 10‑15 seconds. The steam generated prevents the chocolate from drying out while re‑crisping the outer crust.