It was a late‑night craving that turned into a kitchen disaster. I had been scrolling through a recipe book for a simple chocolate treat, only to discover the page was blank—my notebook had been flipped over by a toddler. The smell of burnt sugar wafted through the hallway, and I knew I had to salvage something. So I reached for the pantry, grabbed a bag of espresso powder, and decided to turn that mess into a masterpiece.
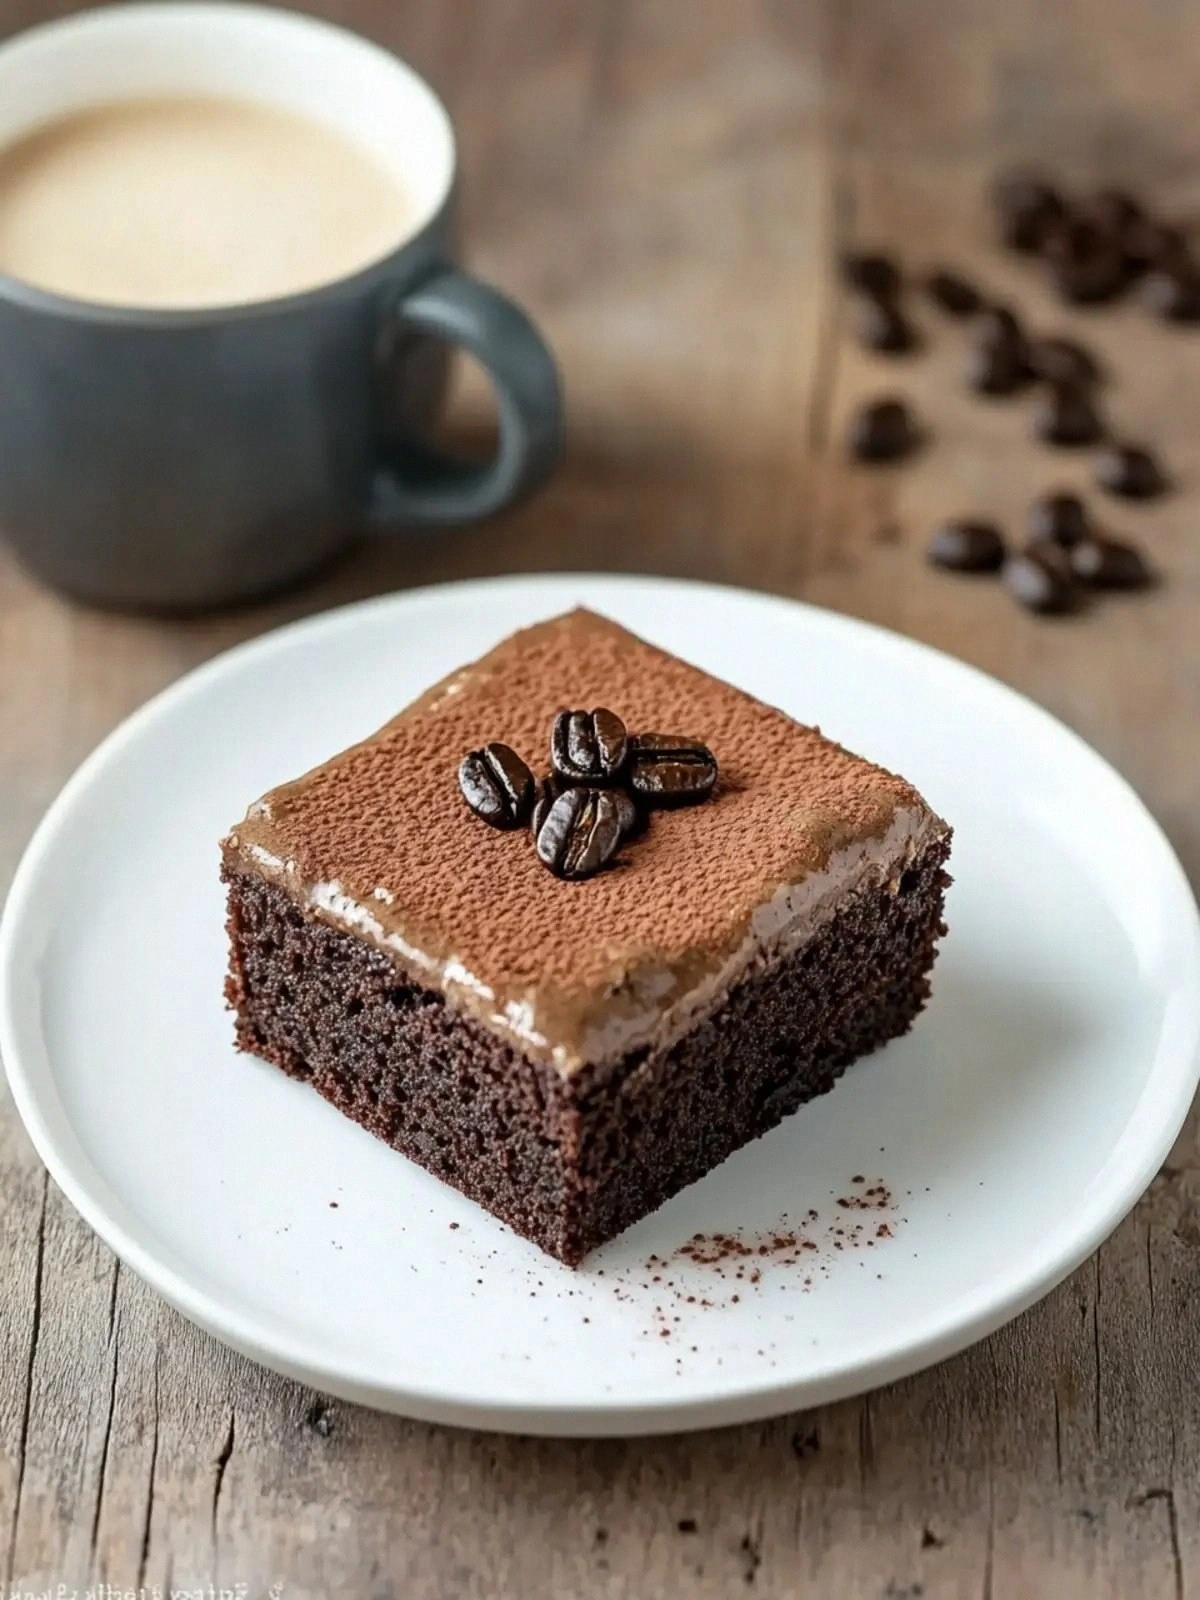
The first bite of the brownies was like a velvet blanket that wrapped around a cup of espresso, sending a cascade of warm, nutty flavors across the palate. The chocolate was deep, not bitter, and the coffee hit you with a bold punch that didn’t overwhelm but rather elevated every bite. I was already planning how to serve them at the next gathering, picturing the crowd’s faces as they took their first forkful. If you’ve ever had a batch that tasted like a sad, soggy cookie, this will change your entire perception of brownies.
I dare you to taste this and not go back for seconds, because the richness is almost addictive. Most people think you need a fancy kitchen gadget to make a great coffee brownie, but I’ll tell you, the secret lies in the ratio of espresso to chocolate. The subtle acidity of the espresso balances the sweetness, creating a harmony that’s impossible to replicate with regular coffee. This is hands down the best version you’ll ever make at home, and I’m about to show you why.
Picture yourself pulling a tray of golden brownies from the oven, the kitchen smelling incredible, and the edges crisping to a perfect caramelized ring. I’ve spent months tweaking the recipe to get that balance right, and the final version feels like a warm hug in dessert form. The texture is a dream—moist in the middle, slightly chewy, with a crackly top that snaps when you bite. Stay with me here—this is worth it, and by the end of this post you’ll wonder how you ever baked without this exact method.
If you’ve ever struggled with brownies that come out too dry or too gooey, you’re not alone. I’ve seen countless posts where the batter is either a sticky mess or a dry crumb, and I’m here to give you the fix. The key is to treat the chocolate and espresso as partners rather than enemies, allowing them to mingle in a harmonious dance. When you add the espresso powder at the right moment, the chocolate’s flavor unlocks, revealing depth that feels almost coffee shop‑quality. And don’t forget the chocolate chips—they add a surprise burst of goo that makes every bite memorable.
What Makes This Version Stand Out
- Depth of Flavor: The espresso powder and brewed coffee work together to give the brownies a rich, coffee‑infused undertone that feels sophisticated and comforting. The chocolate’s bitterness is softened by the espresso, creating a balanced profile that lingers on the tongue.
- Texture Perfection: The batter’s consistency is just right—dense enough to hold the chocolate chips yet airy enough to keep the center moist. The edges form a crisp crust while the middle remains tender, giving a satisfying bite that doesn’t feel heavy.
- Simple Ingredients: You don’t need exotic flours or specialty sugars; this recipe relies on pantry staples that you probably already own. The only “special” item is espresso powder, which is inexpensive and can be stored for years.
- Make‑Ahead Friendly: These brownies can be baked ahead of time and stored at room temperature for up to a week, making them perfect for parties or last‑minute dessert needs.
- Crowd Reaction: Friends who taste these brownies often remark that they taste like a high‑end chocolate shop, and they keep asking for the recipe. The coffee undertone is subtle enough to not alienate those who aren’t coffee lovers.
- Versatile Frosting: The mocha frosting not only adds sweetness but also enhances the coffee flavor, turning each bite into a layered experience.
- Easy Cleanup: Because the recipe uses simple butter, sugar, and flour, the cleanup is straightforward—no heavy pans or lingering chocolate residue.
- Balanced Nutrition: While indulgent, the brownies still offer a decent protein content thanks to the eggs, making them a more satisfying treat.
Inside the Ingredient List
The Flavor Base
At the heart of these brownies is the marriage of butter, sugar, and eggs. Butter melts to create a silky foundation that allows the chocolate to seep in, while the sugar caramelizes slightly during baking to add a subtle crunch. The eggs act as a binder, holding everything together and giving the brownies that coveted rise. If you skip the eggs, the batter will crumble and fail to set, leaving you with a flat, dry mess.
Choosing a high‑quality unsalted butter can make a noticeable difference. Unsalted butter lets you control the salt content, which is crucial when you’re also adding a pinch of salt to the frosting. When the butter is at room temperature, it blends more smoothly with the sugar, ensuring an even batter. A small tip: chill the butter for 10 minutes before using it, so it’s firm enough to handle but still soft enough to mix.
The eggs are the unsung heroes that give the brownies their structure. They provide protein, which forms a network as the batter bakes, giving the brownies that chewy, slightly gummy texture people love. If you’re looking for a vegan version, you can replace each egg with a tablespoon of applesauce or a flaxseed “egg.” However, the texture will change, so be prepared for a different experience.
The Texture Crew
The flour, cocoa powder, and baking powder are the backbone of the batter’s structure. The flour gives body, while the cocoa powder adds depth and a hint of bitterness that balances the sweetness. Baking powder ensures a slight lift, preventing the brownies from sinking. If you prefer a denser brownie, reduce the baking powder; for a lighter one, increase it slightly.
The chocolate chips are the surprise element that makes each bite exciting. They melt into pockets of gooey chocolate that contrast with the dense base. If you’re a fan of a more intense chocolate flavor, replace the chips with a mixture of dark and semi‑sweet chocolate pieces. Just remember to chop them evenly so they melt uniformly.
The espresso powder is the secret weapon that brings the coffee flavor to the forefront. It’s more concentrated than brewed coffee, so a small amount goes a long way. If you can’t find espresso powder, you can use instant coffee, but the flavor will be slightly different—less robust and a bit more bitter.
The Unexpected Star
The mocha frosting is the pièce de résistance that elevates the entire dessert. It’s made from a combination of powdered sugar, cocoa, brewed coffee, and vanilla, creating a silky, sweet coating that coats the brownies like velvet. The frosting’s slight bitterness from the cocoa balances the sweetness, while the coffee adds depth. If you’re a coffee connoisseur, you can use a cold brew concentrate for an even stronger coffee kick.
Adding vanilla to the frosting is essential; it rounds out the coffee’s sharp edges and adds a fragrant aroma that lingers. A pinch of salt in the frosting is a subtle trick that enhances the chocolate and coffee flavors, preventing the sweetness from feeling flat. If you’re watching sodium, you can omit the pinch, but the taste will be slightly less complex.
The powdered sugar in the frosting is the sweetener that gives the coating its smooth texture. It dissolves quickly, creating a glaze that sets as it cools. If you prefer a dusting rather than a glaze, reduce the powdered sugar and increase the cocoa. That will give the frosting a thicker consistency, perfect for a more decadent finish.
The Final Flourish
Everything’s prepped? Good. Let’s get into the real action. The next steps will bring all those ingredients together, turning them from a list into a luscious treat. I’ll guide you through each moment, so you don’t miss any critical detail that could ruin the whole batch.
Before you start, preheat your oven to 350°F (175°C) and line an 8x8 inch pan with parchment paper. The parchment ensures easy removal and prevents sticking, especially when the chocolate chips start to melt. If you don’t have parchment, a silicone mat works just as well. Remember to grease the paper lightly with butter or oil to keep the brownies from pulling off.
The oven temperature is crucial for the brownies’ texture. Too hot, and the edges will burn before the center sets; too cool, and the brownies will be dense and undercooked. I’ve tested this recipe at 350°F, and it consistently yields a perfect balance. If your oven runs hot, lower the temperature by 25°F and add a few extra minutes to the bake time.
The Method — Step by Step
- Melt the 1/2 cup of unsalted butter in a medium saucepan over low heat until fully liquid. Stir occasionally to prevent burning. Once melted, remove from heat and let it cool for a minute—this helps the sugar dissolve more evenly. The butter’s aroma should fill the kitchen, signaling that you’re on the right track. I’ve found that a slightly warm butter yields a smoother batter.
- In a large mixing bowl, whisk together 1 cup of granulated sugar and the melted butter until the mixture is silky and the sugar has dissolved. The mixture should look slightly thickened, like a light custard. This step is vital because it ensures the sugar and butter are fully integrated, preventing a gritty texture. A small tip: use a whisk instead of a spoon for a smoother blend. The batter will be glossy once the sugar is fully incorporated.
- Add the 2 large eggs one at a time, whisking vigorously after each addition. The eggs should be fully blended before adding the next. This creates a homogeneous batter that will rise evenly in the oven. If you’re concerned about raw egg smell, you can briefly heat the batter on low heat—just enough to warm it, not cook it. The batter should be thick yet pourable.
- Stir in 1 teaspoon of vanilla extract and 2 tablespoons of instant espresso powder. The espresso powder should dissolve completely, leaving no gritty residue. The vanilla adds warmth, while the espresso brings a bold depth that’s essential to the coffee brownie experience. A kitchen hack here: sift the espresso powder before adding it to ensure a smooth batter. The aroma of coffee will start to dominate, which is a good sign.
- In a separate bowl, whisk together 1/3 cup of unsweetened cocoa powder, 1/2 cup of all‑purpose flour, 1/4 teaspoon of baking powder, and 1/4 teaspoon of salt. These dry ingredients should be well combined to avoid clumps. Pour the dry mix into the wet batter, folding gently until just combined. Overmixing can lead to a tough brownie, so stop as soon as the flour is incorporated. The batter should have a thick, pourable consistency.
- Fold in 1/2 cup of semi‑sweet chocolate chips, ensuring they’re evenly distributed. The chips will melt into pockets of chocolate throughout the brownies. If you prefer a more intense chocolate flavor, you can double the chips. The batter should now have a speckled appearance. This is the moment when the chocolate chips start to look like tiny stars in a midnight sky.
- Pour the batter into the prepared pan, spreading it evenly with a spatula. The batter should fill the pan to the top without overflowing. Place the pan in the preheated oven and bake for 30 minutes, or until a toothpick inserted into the center comes out with a few moist crumbs. Watch for the edges: they should pull away slightly from the pan, indicating doneness. This is the trickiest part—if you pull it out too early, the center will be undercooked.
- Let the brownies cool in the pan for 10 minutes, then transfer them to a wire rack to cool completely. The cooling time is essential; it allows the structure to set, preventing them from crumbling when sliced. Once cooled, cut them into squares and set aside. The brownies will feel slightly firm but still soft to the touch.
- For the frosting, melt 1/4 cup of unsalted butter in a saucepan over low heat until fully liquid. The butter should be glossy, not browned. In a separate bowl, whisk together 1 1/2 cups of powdered sugar and 3 tablespoons of unsweetened cocoa powder until smooth. Combine the melted butter with the powdered sugar mixture, whisking until the frosting is thick and silky. The consistency should be pourable yet hold its shape when drizzled.
- Stir in 1 tablespoon of strong brewed coffee, 1/2 teaspoon of vanilla extract, and a pinch of salt into the frosting. The coffee should be freshly brewed for the best flavor. The vanilla adds a sweet aroma, while the salt balances the sweetness. Once the frosting is smooth, spread it over the cooled brownies using a spatula. Let the frosting set for 10 minutes before serving.
- Serve immediately or store in an airtight container at room temperature for up to 5 days. For longer storage, wrap the brownies in plastic wrap and freeze them for up to 3 months. When you’re ready to enjoy, let them thaw at room temperature for 20 minutes. The brownies will retain their moisture and flavor, just like fresh.
Insider Tricks for Flawless Results
The Temperature Rule Nobody Follows
Many bakers think room‑temperature butter is the only requirement, but the temperature of your oven can make or break the brownies. A slightly lower oven temperature (350°F instead of 375°F) gives the brownies time to set without overcooking the edges. I’ve found that preheating for 15 minutes ensures a consistent temperature. If your oven runs hot, use an oven thermometer to confirm, and adjust accordingly.
Why Your Nose Knows Best
The aroma that rises from the batter is a reliable indicator of doneness. When the chocolate and coffee smell caramelized, the brownies are nearly ready. The scent should be sweet and slightly bitter, with a hint of espresso. If the smell is too sharp, the brownies are underbaked; if it’s flat, they’re overbaked. Trust your nose, it’s a seasoned judge.
The 5-Minute Rest That Changes Everything
Letting the brownies rest for 5 minutes after removing them from the oven allows the internal structure to settle. This short pause prevents the brownies from collapsing when you cut them. The rest also lets the frosting set slightly, giving a smoother finish. If you skip this step, the brownies may crumble or the frosting may slide off.
Don’t Skimp on the Chocolate Chips
The chocolate chips are the stars of the show, and a generous amount ensures each bite is a chocolate explosion. If you’re a chocolate lover, double the chips and you’ll have a brownie that’s practically a chocolate cake. However, be mindful of the ratio—too many chips can make the batter too wet. Adjust the flour slightly if you add more chips.
Use a Silicone Mat for Easy Cleanup
A silicone baking mat keeps the brownies from sticking to the pan and makes cleanup a breeze. It also provides a non‑stick surface for the chocolate chips to bake evenly. I’ve used a mat for years and never had to scrub a pan after baking brownies. It’s a small investment that pays off with minimal effort.
Creative Twists and Variations
Mocha‑Mint Madness
Add a tablespoon of peppermint extract to the frosting for a minty twist that pairs beautifully with the coffee. The mint will add a refreshing aftertaste that keeps the brownies from feeling too heavy. This variation is perfect for holiday gatherings or a summer brunch.
Nutty Espresso Explosion
Incorporate 1/4 cup of chopped walnuts or pecans into the batter for a crunchy texture. The nuts add a nutty flavor that complements the coffee, creating a multi‑sensory experience. Toast the nuts lightly before adding them to enhance their flavor.
Caramel Swirl Surprise
Swirl in a few tablespoons of caramel sauce into the batter before baking. The caramel will melt into pockets of sweetness, adding a layer of indulgence. This version works well for dessert parties where guests love a caramel‑chocolate combo.
Vegan Chocolate Coffee Delight
Replace the butter with coconut oil and the eggs with flaxseed eggs for a vegan version. Use plant‑based powdered sugar and a dairy‑free chocolate coating. The texture will be slightly denser, but the coffee flavor remains strong.
Spiced Espresso Brownie
Add a pinch of ground cinnamon and a dash of cayenne pepper to the batter for a subtle spice note. The warmth of cinnamon balances the bitterness of espresso, while cayenne adds a hint of heat. This variation is ideal for those who enjoy a bit of spice in their desserts.
Storing and Bringing It Back to Life
Fridge Storage
Store the brownies in an airtight container in the refrigerator for up to 5 days. The cool temperature helps maintain moisture without drying them out. When you’re ready to serve, let them sit at room temperature for 10 minutes to soften slightly.
Freezer Friendly
Wrap each brownie individually in plastic wrap, then place them in a freezer bag. They’ll stay fresh for up to 3 months. To thaw, leave them in the refrigerator overnight, then let them warm at room temperature for 20 minutes before serving. The texture remains tender and flavorful.
Best Reheating Method
If the brownies have dried out a bit, add a tiny splash of water to the pan before reheating in the oven at 300°F for 5 minutes. The water steams the brownies, restoring moisture and giving them a fresh feel. Avoid microwaving, as it can make them chewy.