Picture this: a midnight snack craving that turns into a kitchen catastrophe. I was halfway through a bowl of stale cereal, the fridge was bare, and the only thing left was a bag of oats and a jar of honey. The idea of turning those humble pantry staples into something spectacular sparked a culinary rebellion. I dared myself to create a treat that would satisfy my sweet tooth without the guilt, and I was determined to make it the best version you’ll ever bake at home. The moment the oven timer buzzed, a wave of chocolate aroma flooded the kitchen, and the whole house seemed to pause for a second. That instant, I realized I had stumbled upon a secret recipe that would become a staple in my snack rotation.
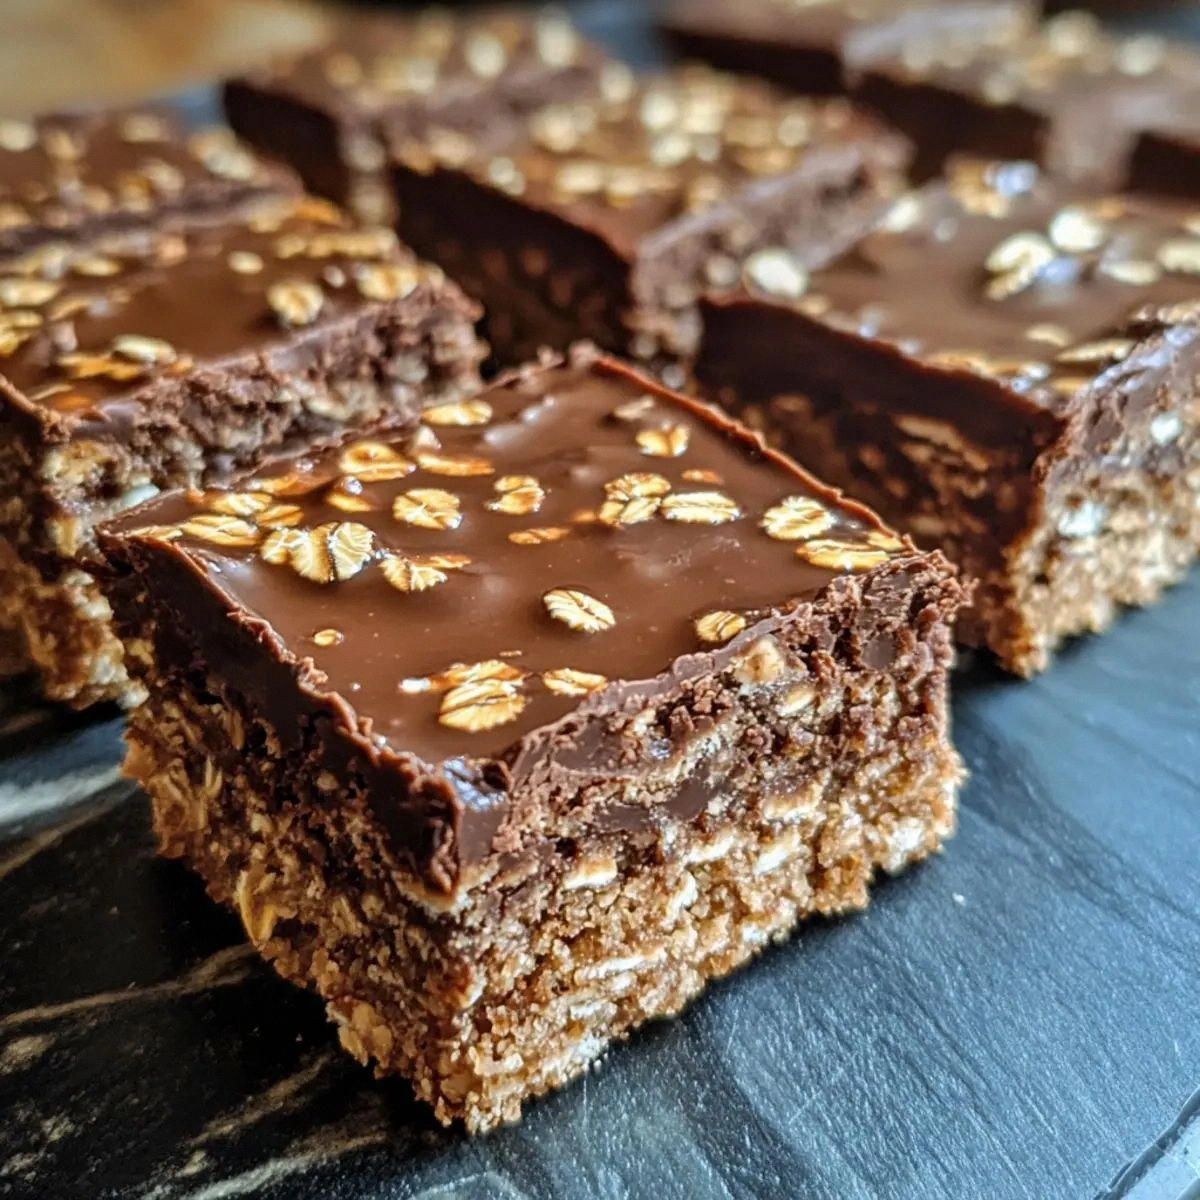
Now, let’s talk senses: the sight of glossy chocolate chips glimmering like tiny moons in a dark batter, the smell of toasted oats mingling with caramelized honey, the sound of a gentle sizzle as butter melts, the taste of a chocolate‑oat bite that balances sweet and savory, and the feel of the dough—firm yet yielding, ready to be pressed into a pan. Every element is designed to deliver a texture that’s chewy yet crunchy, a flavor that’s deep yet approachable, and a look that’s irresistible. I’ve tweaked the ratios so that each square is perfectly balanced, avoiding the common pitfalls of overly dry or overly gooey results. The secret? A splash of vanilla, a pinch of salt, and the right blend of whole wheat flour to keep it hearty. The result is a dessert that feels like a guilty pleasure but is actually a wholesome treat. This version stands out because it turns ordinary pantry ingredients into a mouth‑watering masterpiece.
If you’ve ever tried to bake a chocolate oat bar and ended up with a dry mess or a sticky batter that stuck to every surface, you’re not alone. Most recipes get this completely wrong by using too much butter or too little flour, leading to a texture that’s either rubbery or crumbly. I’ve learned that the key lies in balancing moisture with structure, and that’s why I’ve added a touch of honey for natural sweetness and a dash of baking powder for lift. The result is a dense, fudgy square that holds together but still melts in your mouth. I dare you to taste this and not go back for seconds—trust me, you’ll want to share it, but you’ll also want to keep it all to yourself. Picture yourself pulling this out of the oven, the whole kitchen smelling incredible, and the first bite delivering that satisfying chocolate hit.
By the end of this post, you’ll have a recipe that’s so simple, it feels like a cheat code for dessert lovers, and so delicious, it’ll make you question why you ever settled for store‑bought bars. I’ll walk you through every single step, from the initial mix to the final cut, and I’ll share micro‑challenges and kitchen hacks that will elevate your baking game. Let me walk you through every single step — by the end, you'll wonder how you ever made it any other way.
What Makes This Version Stand Out
- Flavor: The combination of dark cocoa and honey creates a rich, deep chocolate experience that’s far from ordinary. The sweet‑savory balance keeps the squares from feeling heavy or cloying. Every bite is a burst of chocolate that lingers pleasantly on the palate.
- Texture: The oats give a satisfying chew, while the whole wheat flour adds a subtle nuttiness that complements the chocolate. The butter provides a silky mouthfeel, and the chocolate chips add a delightful crunch. The result is a multi‑layered bite that’s never monotonous.
- Nutrition: With 350 calories per serving and 25 grams of protein, these squares are a healthier alternative to traditional chocolate bars. The oats and whole wheat flour contribute fiber, while the natural sweeteners keep added sugars in check. It’s a dessert that can fit into a balanced diet.
- Ease: No complicated techniques or exotic ingredients—just pantry staples that you likely already have. The method is straightforward, with minimal mixing and a single bake step. Even novice bakers will feel confident and excited to try this.
- Versatility: Whether you’re looking for a quick snack, a party treat, or a comforting dessert, these squares adapt to any occasion. They can be served warm with a drizzle of honey or cooled for a firm bite. The recipe is a blank canvas for creative twists.
- Make‑ahead: Bake once, store in an airtight container, and enjoy for up to a week. The squares maintain their texture and flavor, making them ideal for busy schedules. They’re also freezer‑friendly for longer storage.
- Ingredient Quality: Using high‑quality cocoa and whole wheat flour ensures a robust flavor profile. The natural sweeteners—honey or maple syrup—add depth without artificial additives. Every component is chosen for both taste and health benefits.
- Presentation: The squares bake into a glossy, dark chocolate crust that looks as good as it tastes. When cut, they reveal a moist interior studded with chocolate chips and nuts. The visual appeal is a bonus that makes them perfect for gifting.
Inside the Ingredient List
The Flavor Base
Old‑fashioned oats are the heart of these squares, providing a chewy texture and a nutty undertone that grounds the chocolate flavor. They absorb the butter and honey, creating a cohesive batter that holds together when cut. If you skip the oats, the squares become too dry and crumbly, losing that signature chew. For a smoother bite, try using quick oats, but you’ll sacrifice some chewiness.
The Texture Crew
Whole wheat flour replaces all‑purpose flour to add a wholesome, slightly grainy texture that pairs beautifully with oats. It also boosts the fiber content, making the squares more filling. If you’re gluten‑free, substitute with a 1:1 blend of oat flour and rice flour, but expect a slightly different mouthfeel. The baking powder is a leavening agent that ensures the squares rise just enough to stay tender.
The Unexpected Star
Unsweetened cocoa powder brings depth and a robust chocolate flavor that’s not overpowering. It also adds antioxidants and a subtle bitterness that balances the honey’s sweetness. If you prefer a sweeter profile, add a tablespoon of cocoa nibs for a crunchy texture. The salt is essential—it enhances all the other flavors and prevents the chocolate from tasting flat.
The Final Flourish
Mini chocolate chips and chopped nuts are the crowning jewels that add bursts of flavor and crunch. The chips melt slightly, creating pockets of chocolate that ooze with every bite. Nuts contribute healthy fats and a satisfying crunch; walnuts or pecans work best. The honey or maple syrup is the natural sweetener that keeps the squares from being overly sugary while providing a subtle floral note.
Everything's prepped? Good. Let's get into the real action...
The Method — Step by Step
-
Gather all your dry ingredients in a large bowl: oats, whole wheat flour, baking powder, salt, cocoa powder, and brown sugar. Stir them together until the mixture is uniform and free of clumps. This step ensures even distribution of leavening and flavor. I recommend using a whisk to give the batter a light, airy texture.
-
In a small saucepan, melt the butter over medium heat until it’s just liquid and slightly golden. Add the honey (or maple syrup) and vanilla extract, stirring until the mixture is smooth and glossy. The butter and honey blend to create a syrupy base that will coat the oats beautifully. Watch the mixture; if it starts to brown too quickly, lower the heat.
-
Pour the wet mixture into the dry ingredients and stir with a spatula until fully incorporated. The batter will look thick and slightly sticky—this is normal. The oats will absorb the liquid, creating a cohesive mass that’s easy to press into a pan. Don’t overmix; a few lumps add texture.
-
Fold in the mini chocolate chips and chopped nuts gently. The chips will start to melt slightly in the warm batter, creating pockets of gooey chocolate. The nuts add crunch and a nutty aroma that complements the chocolate. Make sure to distribute them evenly so each square has a balanced flavor.
-
Line a 9×9‑inch baking pan with parchment paper or lightly grease it with butter. Press the batter into the pan using a spatula or the back of a spoon, ensuring it’s even and smooth. A tight press helps the squares hold together when cut. If the batter is too loose, let it rest for 5 minutes before pressing.
-
Preheat your oven to 350°F (175°C). Place the pan in the middle rack and bake for 25–30 minutes, or until the edges start to pull away and a toothpick inserted in the center comes out with a few moist crumbs. The aroma should be rich and chocolatey, almost like a chocolate cake. Keep an eye on the color; don’t let it darken too much.
-
Transfer the pan to a wire rack and cool completely at room temperature. Once cooled, lift the squares out using the parchment edges. Cut them into 12 equal squares with a sharp knife. Store the squares in an airtight container; they’ll stay fresh for up to a week.
That's it — you did it. But hold on, I've got a few more tricks that'll take this to another level...
Insider Tricks for Flawless Results
The Temperature Rule Nobody Follows
Many bakers bake at the lowest possible temperature, but that can lead to uneven browning. I’ve found that a steady 350°F (175°C) is the sweet spot for these squares. It allows the batter to set slowly, creating a tender interior while giving the edges a slight crisp. If you’re using a convection oven, reduce the temperature by 25°F to avoid over‑browning.
Why Your Nose Knows Best
Before you even touch the first spoon, the scent of toasted oats and cocoa should hit your nose like a warm hug. That aromatic cue is your green light to proceed. If the aroma feels flat, give the batter a quick stir; sometimes the ingredients settle and lose their vibrancy.
The 5‑Minute Rest That Changes Everything
After baking, let the squares sit in the pan for 5 minutes. This short rest lets the structure set, making the squares easier to cut and reducing the risk of them falling apart. It also allows the chocolate chips to firm up slightly, enhancing the bite.
Pressing Technique for a Perfect Edge
When you press the batter into the pan, use firm, even pressure. A gentle squeeze can cause the squares to crumble, especially if the batter is still warm. A quick press with a spatula or the back of a spoon ensures a clean edge.
Storing Secrets for Long‑Term Freshness
Store the squares in a sealed container with a slice of parchment paper between layers to absorb moisture. For longer storage, freeze the squares on a parchment‑lined tray, then transfer them to a freezer bag. Thaw at room temperature for 20 minutes before serving to restore the texture.
Creative Twists and Variations
Nutty Banana Crunch
Swap the chopped nuts for sliced bananas and add a dash of cinnamon. The banana adds natural sweetness and a moist texture, while the cinnamon introduces warmth. This variation is perfect for a quick breakfast or a post‑workout snack.
Chocolate‑Mint Surprise
Stir in a teaspoon of peppermint extract and a handful of crushed peppermint candies. The mint provides a refreshing contrast to the rich chocolate, making it a festive treat for holidays or a summer cooling snack.
Spiced Caramel Delight
Add a tablespoon of caramel sauce to the batter and a pinch of cayenne pepper. The caramel gives a sweet depth, while the cayenne adds a subtle heat that wakes up the palate. Serve with a dollop of whipped cream for a decadent dessert.
Vegan Version
Replace butter with coconut oil and use maple syrup instead of honey. Swap the brown sugar with coconut sugar for a deeper flavor. This version remains gluten‑free and dairy‑free while preserving the chewy, chocolatey goodness.
Protein Power
Incorporate a scoop of chocolate protein powder into the dry mix and increase the oats to 3 cups. The added protein turns these squares into a post‑workout treat that satisfies both sweet cravings and muscle recovery.
Salted Caramel Crunch
Fold in a handful of salted caramel chips and a pinch of sea salt. The caramel adds a buttery sweetness while the sea salt sharpens the flavor profile. It’s a luxurious twist that’s perfect for entertaining.
Storing and Bringing It Back to Life
Fridge Storage
Place the squares in an airtight container or zip‑top bag, ensuring no air pockets. Store in the refrigerator for up to a week. When ready to enjoy, let them sit at room temperature for 10 minutes to soften slightly.
Freezer Friendly
Lay the squares flat on parchment paper and freeze for 1–2 hours. Transfer to a freezer bag and store for up to 3 months. When you’re ready to eat, thaw at room temperature or microwave on low for 10–15 seconds.
Best Reheating Method
To revive the texture, sprinkle a tiny splash of water over the squares before microwaving. Heat on medium for 15–20 seconds, then let rest for a minute. This steaming trick restores moisture and keeps the squares chewy.