When my friend dared me to make an apple pie that would outshine every bakery in town, I thought it was a joke. Instead of a smooth, buttery crust, the first attempt turned into a soggy, brown disaster that made my kitchen smell like a burnt sugar factory. I stared at the ruined pie, the crust cracked like a dry riverbed, and I knew I had to rewrite the recipe from scratch. The lesson? A perfect apple pie starts with confidence, not just flour and apples. By the end of this post, you'll have a pie that whispers, “I’m the best version you'll ever make at home.”
Picture the kitchen: the air thick with the scent of fresh apples, the gentle clink of a wooden spoon against a stainless steel pot, and the faint crackle of butter melting. The crust should look like a golden sunrise, with a subtle sheen that invites a bite. The first bite should deliver a sweet, tart burst that coats your palate like velvet, followed by a whisper of cinnamon that lingers. The texture is a dance—crisp edges that shatter like thin ice, and a tender interior that melts in your mouth. That moment when the pie meets your fork is a sensory symphony that I dare you to taste and not go back for seconds.
What makes this version stand out is a secret blend of apple varieties that balances tartness and sweetness, a crust that rises like a cloud, and a filling that thickens without adding extra sugar. The technique of chilling the dough in the fridge for at least 30 minutes keeps the butter from melting, giving you a flaky, buttery bite every time. I’ll reveal the trick that most recipes miss: adding a splash of lemon juice to the apples to keep them bright and prevent browning. This combination turns a simple dessert into a showstopper that will have guests asking for the recipe. The result? A pie that feels like a warm hug in every slice.
And the kicker is that I discovered a way to incorporate a subtle hint of vanilla and nutmeg that elevates the entire flavor profile without overpowering the apples. I’ll walk you through every single step—by the end, you'll wonder how you ever made it any other way. The next section will break down the ingredients into four distinct groups, each with a purpose that will make you feel like a culinary wizard. Stay with me here—this is worth it. Let’s dive in.
What Makes This Version Stand Out
Taste: The apple blend creates a harmonious balance of sweet and tart, amplified by a whisper of cinnamon and nutmeg that feels like a secret garden in every bite.
Texture: The crust is flaky and buttery, with a golden crust that cracks like a sunrise, while the filling is silky and thickened with just enough flour to hold its shape.
Convenience: The dough can be prepped a day ahead, chilled, and still deliver the same flaky perfection, making it a no-fuss solution for busy cooks.
Ingredient Quality: Using fresh, firm apples like Granny Smith or Honeycrisp ensures the filling remains crisp, while butter over buttered crust adds depth.
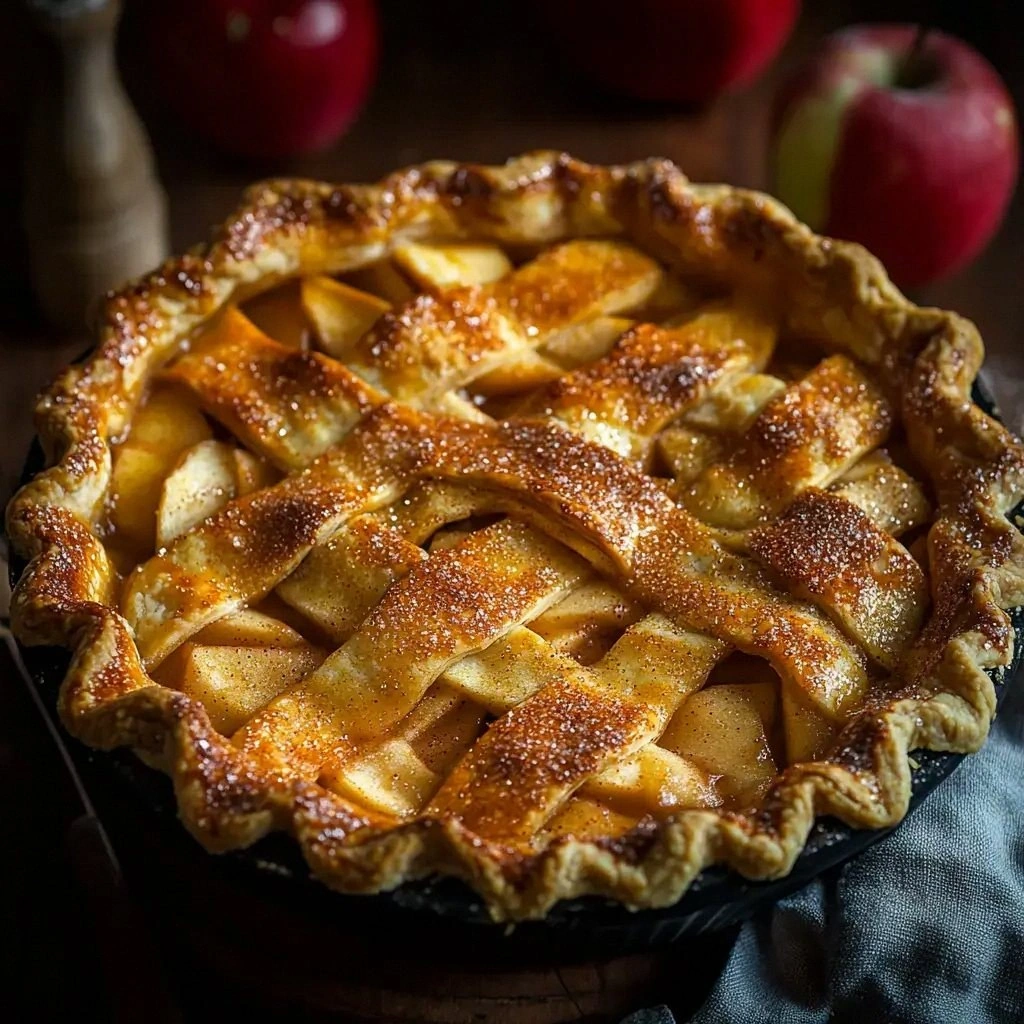
Visual Appeal: The crust’s crisp edges and the bright, caramelized apple topping make for a photo‑ready pie that looks as good as it tastes.
Make‑Ahead Potential: Assemble the pie, bake, and let it cool; it can be stored in the fridge for up to 3 days, retaining its flavor and texture.
Family‑Friendly: The recipe uses simple pantry staples—flour, butter, sugar, apples—making it accessible for beginner cooks.
Alright, let's break down exactly what goes into this masterpiece...
Inside the Ingredient List
The Flavor Base
Apples are the star of any pie, and I choose a mix of Granny Smith and Honeycrisp to get that sweet‑tart bite that sings. The apples are peeled, cored, and sliced thinly to allow the spices to seep in like a fragrant perfume. A splash of lemon juice keeps the slices bright and prevents oxidation, ensuring a vibrant color that looks as good as it tastes. Cinnamon and nutmeg are sprinkled in for depth, and a hint of vanilla ties everything together like a secret handshake. The combination of these flavors creates a filling that is both comforting and exciting.
The vanilla extract, though a small quantity, adds a warm undertone that balances the sharpness of the apples. It’s the subtle difference that elevates a simple pie to something memorable. The final sprinkle of cinnamon after baking gives a fresh aroma that lingers in the kitchen. The apple base is the foundation that holds all other elements together, ensuring each bite is a burst of flavor.
The Texture Crew
Flour is the backbone of the crust, providing structure and a tender crumb when mixed with butter. I use all‑purpose flour for a classic feel, but you can switch to whole wheat for a nuttier profile if you’re feeling adventurous. The butter, cold and cubed, is the secret to flaky layers; each piece melts into the dough, creating pockets that puff up during baking. Sugar is split into white and brown to give the crust a subtle caramelization and a hint of molasses sweetness.
Salt is essential for balancing the sweetness and enhancing the flavors. A pinch is enough to bring out the apple’s natural sugars without overwhelming the dish. Ice water is added gradually to bring the dough together; it keeps the butter from melting before the crust forms. The ratio of water to flour is critical—too much makes the dough sticky, too little makes it crumbly.
The dough is rolled out between two sheets of parchment to prevent sticking and to create a uniform thickness. Rolling it to about 1/8 inch ensures a crisp yet tender crust that holds the filling without becoming too thick. The dough’s texture is the first thing you notice when you bite into the pie, and it sets the tone for the whole experience.
The Unexpected Star
The 2 tablespoons of flour used as a thickening agent are often overlooked but crucial for a filling that holds its shape. This small amount of flour swells when heated, forming a natural binder that prevents the apples from turning into a watery mess. It also creates a glossy finish that makes the pie look professionally plated.
The egg wash is applied to the top crust to give it a golden sheen and a slight crunch. A beaten egg mixed with a splash of water creates a glossy finish that turns to a rich amber color during baking. The egg also helps the crust seal, keeping the filling from leaking and creating a neat, finished look.
The melted butter brushed over the crust before baking adds a buttery sheen and a subtle flavor that enhances the overall taste. It also helps the crust brown evenly, giving you that beautiful, caramelized finish. This final touch transforms a good pie into an unforgettable one.
The Final Flourish
After baking, a light dusting of powdered sugar adds a sweet contrast to the warm spices. The sugar also adds a delicate crunch that balances the soft filling. A drizzle of caramel sauce or a scoop of vanilla ice cream can elevate the dessert to a showstopper for special occasions. The final flourish is what turns a simple pie into a memorable dessert that guests will talk about for weeks.
Everything's prepped? Good. Let's get into the real action...
The Method — Step by Step
In a large bowl, combine the flour and salt. Gradually add the cold butter, using your fingertips or a pastry cutter until the mixture resembles coarse crumbs. The goal is to keep the butter pieces intact; this will create flaky layers when baked. Once the mixture looks like breadcrumbs, drizzle the ice water in a thin stream, stirring until the dough just comes together. The dough should be moist but not sticky, and it should be smooth enough to roll out without tearing.
Wrap the dough in plastic wrap and refrigerate for at least 30 minutes. This chilling step allows the gluten to relax and the butter to firm up, ensuring the crust stays flaky. If you’re in a hurry, a 15‑minute chill works, but the longer the better. After chilling, roll out the dough on a lightly floured surface to a 12-inch circle. Carefully transfer it to a 9-inch pie dish, pressing it into the corners and trimming the excess.
In a large bowl, toss the sliced apples with lemon juice, cinnamon, nutmeg, brown sugar, and vanilla extract until they’re evenly coated. The lemon juice not only brightens the apples but also acts as a natural preservative, keeping the slices from browning. Stir in the 2 tablespoons of flour to thicken the filling as it cooks. This step is essential for a firm, not watery, filling.
Fill the prepared crust with the apple mixture, spreading it out evenly. Gently press the apples into the crust to eliminate air pockets and ensure even baking. Sprinkle an extra pinch of cinnamon on top for a fragrant finish. The filling should look glossy and slightly moist, but not dripping.
Brush the top crust with the beaten egg wash, then sprinkle a thin layer of melted butter on top. This combination creates a shiny, golden crust that’s irresistibly crispy. If you prefer a lattice top, cut the dough into strips and weave them over the filling for a classic look. Either option adds visual appeal and texture.
Preheat your oven to 425°F (220°C). Place the pie on the middle rack and bake for 20 minutes. Reduce the temperature to 375°F (190°C) and bake for an additional 25-30 minutes, or until the crust is golden and the filling is bubbling. The key is to start high to set the crust, then lower to finish the filling without burning.
Remove the pie from the oven and let it rest on a wire rack for at least 30 minutes. This rest period allows the filling to set, preventing it from sliding off the crust. It also lets the steam escape, giving you a crisp bottom. The aroma at this point will be intoxicating, making it hard to resist the temptation to take a bite.
Serve warm with a scoop of vanilla ice cream or a drizzle of caramel sauce. The contrast of hot pie and cold ice cream is a classic that never disappoints. If you’re hosting a crowd, offer both options to cater to all palates. The pie will keep its flavor and texture for up to 3 days in the fridge.
For a quick snack, slice a piece and toast it in a pan with a bit of butter. This transforms the pie into a warm, gooey treat that’s perfect for a midnight craving. The crust will become extra crisp, and the filling will be silky and caramelized.
That's it — you did it. But hold on, I've got a few more tricks that'll take this to another level...
Insider Tricks for Flawless Results
The Temperature Rule Nobody Follows
Most people bake at a single temperature, but the secret lies in a two‑stage bake. Start with a high heat to set the crust, then lower the temperature to finish the filling. This technique prevents the crust from over‑browning while ensuring the filling cooks evenly. I’ve seen many pies come out with a burnt top and a soggy bottom, but this rule guarantees a perfect balance. Try it next time and taste the difference.
Why Your Nose Knows Best
Before you open the oven, listen for that toasty aroma that signals the crust is golden. Your nose can tell you when the pie is ready even before the timer hits zero. The smell of caramelizing sugar and butter is a reliable indicator. Don’t rely solely on the clock; trust your senses for the best result. This simple habit saves you from over‑baking.
The 5‑Minute Rest That Changes Everything
After baking, let the pie rest for exactly five minutes before cutting into it. This rest period allows the juices to redistribute, preventing a watery mess. The crust also settles, giving you a cleaner slice. I’ve seen people cut into a pie too early and get a mess of apple filling. This small pause makes a huge difference.
How to Keep the Crust Crispy
Keep a small bowl of water near the oven while baking; the steam will help keep the crust from drying out. If you prefer a crunchier crust, brush it with melted butter before baking. This creates a barrier that locks in moisture. The result is a crust that remains crisp even after a few hours of cooling.
Timing the Filling for Peak Sweetness
When you first add the apples, let them sit for 10 minutes. This allows the spices to infuse and the apples to release their natural juices. The filling will then cook into a thick, glossy sauce. I’ve found that skipping this step leads to a drier filling. Give it the time it needs.
Preventing Crumbly Bottoms
Place a sheet of parchment paper over the crust before adding the filling. This prevents the dough from sticking and keeps the bottom from becoming soggy. Once the pie is baked, remove the parchment carefully. The crust remains firm, and the filling stays intact.
Now you have the secret sauce to make every pie a masterpiece.
Creative Twists and Variations
This recipe is a playground. Here are some of my favorite ways to switch things up:
Apple and Pear Fusion
Swap half the apples for sliced pears to add a subtle sweetness and a silky texture. The pears complement the tart apples and bring a new dimension to the filling. Add a pinch of cardamom for a warm, aromatic twist. This version is perfect for a fall gathering or a cozy Sunday brunch. The result is a balanced, complex flavor profile that delights the palate.
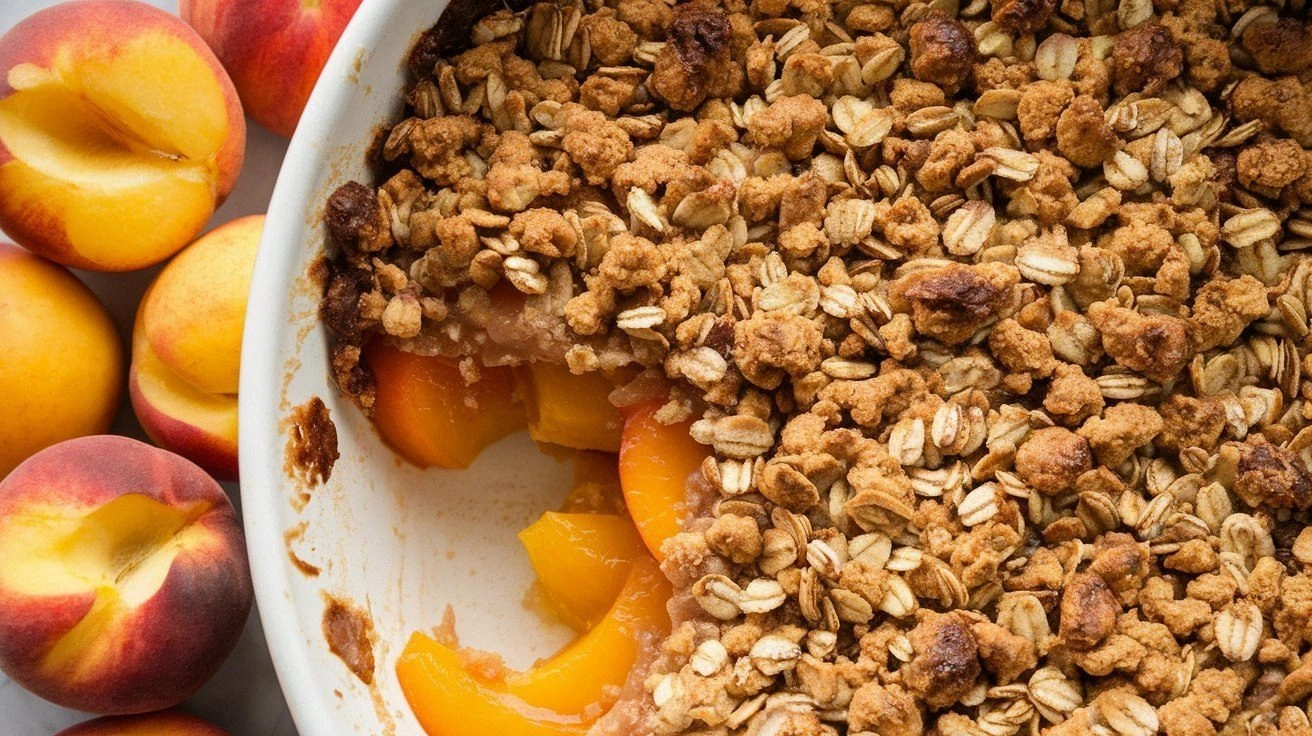
Spiced Apple Crumble Pie
Top the pie with a crumble made from oats, butter, brown sugar, and cinnamon. This crunchy layer adds a delightful texture contrast. The crumble also absorbs excess moisture, keeping the filling from becoming soggy. It’s a great way to add an extra layer of flavor without changing the base recipe. The final product is a pie that feels like a dessert and a snack.
Caramel Apple Pie with a Crunchy Topping
Drizzle caramel sauce over the baked pie for an indulgent twist. Add chopped pecans or walnuts for a satisfying crunch. The caramel adds a buttery sweetness that pairs beautifully with the apples. This variation is ideal for holiday celebrations or a dessert buffet. The caramelized finish makes it a showstopper.
Almond‑Infused Apple Pie
Replace the flour in the crust with almond flour for a nutty flavor and a gluten‑free option. Add sliced almonds to the filling for extra crunch. The almond undertone enhances the apple’s natural sweetness. This version is perfect for those with gluten sensitivities or anyone who loves a nutty twist. The result is a unique, gourmet pie.
Low‑Sugar Apple Pie with Stevia
Use stevia or monk fruit sweetener in place of white sugar for a low‑calorie dessert. Keep the brown sugar for the crust to maintain flavor and texture. Adjust the amount of sweetener to taste, as these products can vary in intensity. This pie is a great option for those watching their sugar intake. The flavors stay robust without the added calories.
Gluten‑Free Apple Pie
Swap the all‑purpose flour with a gluten‑free blend that includes xanthan gum for structure. Use a gluten‑free pie crust mix if you prefer a quick fix. The texture will be slightly different but still delicious. This version is ideal for those with celiac disease or gluten sensitivities. The pie tastes just as comforting as the classic version.
With these variations, you can keep the core of the pie while exploring new flavors.
Storing and Bringing It Back to Life
Fridge Storage
Cool the pie completely before refrigerating. Store it in an airtight container or wrap it tightly in plastic wrap to prevent drying. The pie will stay fresh for up to 3 days, and the crust will remain crisp if you reheat it briefly. When you’re ready to serve, let it sit at room temperature for 10 minutes to soften the filling. The result is a slice that tastes almost fresh.
Freezer Friendly
Wrap the pie tightly in plastic wrap and then in aluminum foil before freezing. It can stay in the freezer for up to 2 months without losing quality. Thaw the pie overnight in the refrigerator, then bake at 350°F (175°C) for 15 minutes to restore crispness. This method keeps the pie’s texture intact and makes it a convenient option for future meals. The pie will still taste as good as when it was freshly baked.
Best Reheating Method
Reheat the pie in a preheated oven at 350°F (175°C) for 10-12 minutes. This gentle heat restores the crust’s crispness and warms the filling evenly. If you prefer a quick fix, use a microwave, but be careful not to overheat and dry out the filling. For the best flavor, finish with a quick broil for 1-2 minutes to crisp the top. The aroma will fill your kitchen, making it irresistible.
Whether you’re saving for a holiday or a last‑minute dinner, these tips keep your pie fresh and delicious.