I remember the night it all went wrong—my kitchen turned into a chocolate war zone, and I was staring at a pot that looked like it might erupt. The smell of melted chocolate mingled with the faint scent of toasted rice cereal, a scent that instantly pulled me back from the brink of culinary disaster. I dared my friends to taste a single bite and then go back for seconds, and they all admitted defeat. That night, a simple craving for something sweet and crunchy became a mission: to create the ultimate Christmas Chocolate Rice Krisp.
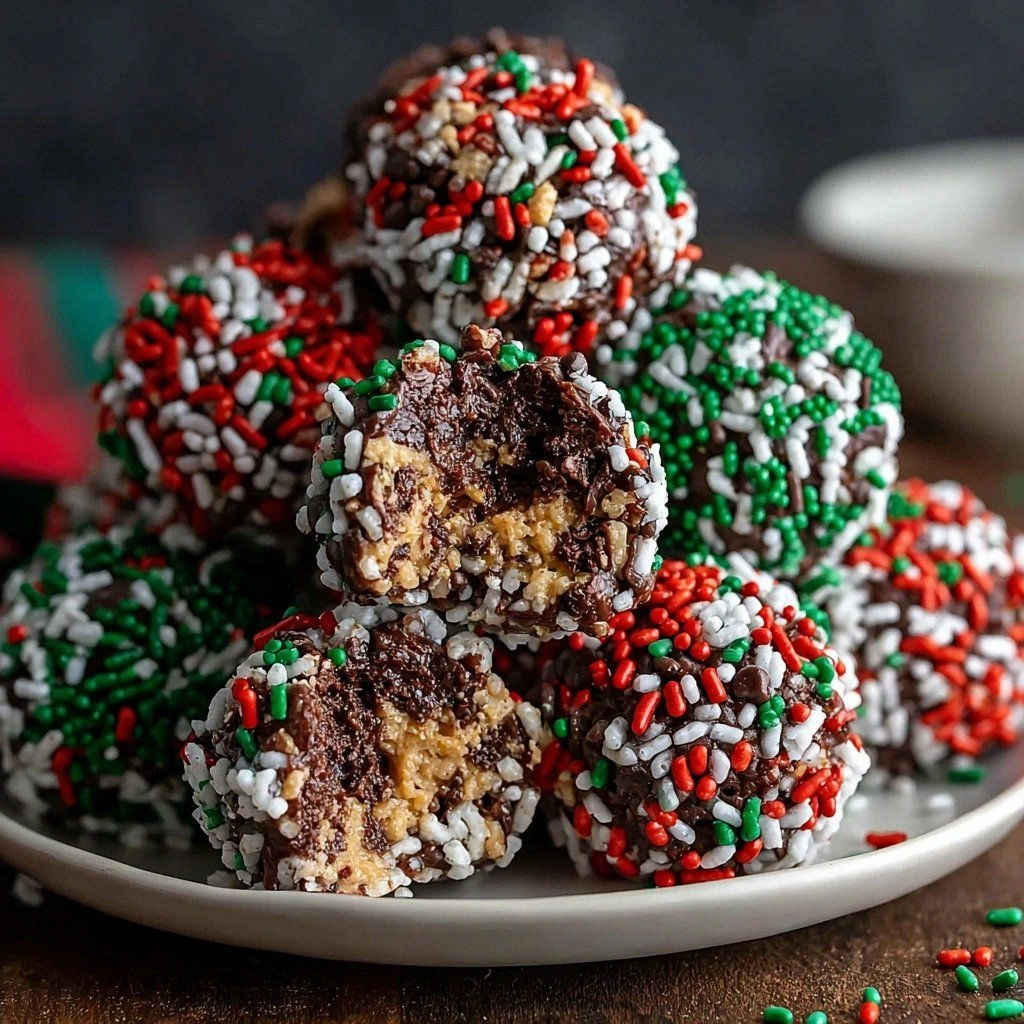
Picture this: a bowl of bright, golden Rice Krispies that crackle like a winter fire when you stir them. The chocolate chips melt into a glossy, dark river that coats each puffed grain, while a swirl of peanut butter adds a silky, nutty undertone. The honey’s natural sweetness balances the bitterness of the chocolate, and powdered sugar gives the mixture a gentle, cloud‑like sweetness that isn’t overpowering. Sprinkles—red, green, gold—add a festive pop of color that makes every bite feel like a holiday surprise.
What makes this version stand out? It’s the harmony of textures—crunchy, chewy, and slightly gooey—combined with a flavor profile that feels like a holiday movie in your mouth. It’s not just another snack; it’s a conversation starter that will have your guests asking for the recipe while they’re still savoring the last bite. The secret lies in the precise ratio of ingredients, the gentle heat that melts the chocolate without scorching, and the final touch of sprinkles that turn an ordinary treat into a visual masterpiece.
I’ll walk you through every single step, from the first stir to the final sprinkle. By the end, you’ll wonder how you ever made it any other way. Let’s dive into the magic that turns ordinary pantry staples into a Christmas delight.
What Makes This Version Stand Out
- Taste: The combination of semi‑sweet chocolate, creamy peanut butter, and natural honey creates a layered flavor that’s both rich and balanced. The chocolate melts into a silky coating, while the peanut butter adds a subtle nuttiness that elevates the overall profile.
- Texture: Each bite delivers a satisfying crunch from the Rice Krispies, a chewy center from the melted chocolate, and a slight stickiness that keeps the mixture together. The result is a treat that feels like a holiday memory in your mouth.
- Simplicity: No fancy equipment or complicated techniques—just a saucepan, a whisk, and a bowl. Even a novice can replicate this with minimal effort.
- Uniqueness: The addition of peanut butter and honey gives it a depth that most traditional Rice Krisp treats lack. It’s a twist that feels both familiar and refreshingly new.
- Crowd Reaction: Friends and family will be amazed at how the mixture holds together without baking. The instant gratification of forming bite‑sized balls makes it a perfect party snack.
- Ingredient Quality: Using high‑quality chocolate chips and real honey makes all the difference. The better the ingredients, the richer the flavor.
- Cooking Method: The gentle simmer allows the chocolate to melt evenly while preventing the mixture from scorching. This method ensures a smooth, glossy coating.
- Make‑Ahead Potential: These treats keep well at room temperature for up to a week, making them ideal for holiday parties or gift‑giving.
Alright, let's break down exactly what goes into this masterpiece...
Inside the Ingredient List
The Flavor Base
Rice Krispies are the backbone of this recipe. They provide the airy crunch that’s essential for the texture. If you use a different puffed cereal, the flavor will shift subtly, but the overall structure remains. Skipping Rice Krispies would turn this into a chocolatey paste with no bite.
Chocolate Chips bring the rich, velvety chocolate flavor. Semi‑sweet or dark chocolate works best because they melt smoothly and don’t overpower the other ingredients. If you’re allergic to dairy, look for dairy‑free chocolate chips that still melt well.
The Texture Crew
Peanut Butter adds creaminess and a nutty depth that balances the sweetness. It also helps bind the mixture, giving it a cohesive structure that can be rolled into balls. If you’re allergic to peanuts, sunflower seed butter is a perfect substitute.
Honey is the natural sweetener that glues everything together. It adds a subtle floral note and helps the mixture set without becoming too sticky. Maple syrup can replace honey for a vegan version, but the flavor profile will shift slightly.
The Unexpected Star
Powdered Sugar is the finishing touch that sweetens the mixture just enough to make it irresistible. It also adds a touch of fluffiness to the surface. If you prefer a less sweet treat, simply reduce the amount or omit it entirely.
The Final Flourish
Sprinkles are the decorative element that turns a simple snack into a festive treat. They add color, crunch, and a playful holiday vibe. Choose any color that matches your theme—red for Santa, green for reindeer, or gold for a touch of sparkle.
Everything's prepped? Good. Let's get into the real action...
The Method — Step by Step
- Heat a medium saucepan over medium heat and pour in the honey. Watch it bubble gently; this is the base of your flavor. Stir constantly to prevent scorching. The honey should start to steam, releasing a sweet aroma that signals readiness.
- Add the peanut butter to the honey, whisking until it’s fully incorporated. The mixture should become smooth and glossy. This is the moment when the peanut butter’s creaminess begins to mingle with the honey’s sweetness. Keep the heat low to avoid burning.
- Introduce the chocolate chips gradually, stirring until they melt completely. The mixture should look like melted chocolate thickened with honey. The temperature should stay below 200°F to preserve the chocolate’s silky texture. If the mixture looks too thick, add a splash of water to thin it slightly.
- Fold in the powdered sugar, stirring until the sugar dissolves and the mixture thickens. The sugar not only sweetens but also helps the mixture set. You’ll notice the mixture turning a lighter shade as the sugar blends in.
- Remove the saucepan from heat and let it cool for a minute. Then add the Rice Krispies, tossing until each cereal piece is coated. The mixture should be warm enough to stick together but not hot enough to burn the rice. The coating should be glossy and cling to the cereal.
- Transfer the mixture to a parchment‑lined tray and press it into a flat layer about 1/2 inch thick. Use a spatula to smooth the surface. This step is crucial for even cooling and easy portioning later.
- Let the mixture cool completely at room temperature; this usually takes 20–30 minutes. As it cools, the mixture will firm up into a moldable consistency. Patience here ensures that the final bites hold together.
- Once cooled, use a knife or cookie cutter to cut the slab into bite‑sized pieces. Roll each piece into a ball by pressing gently between your palms. The balls should hold their shape without crumbling.
- Roll the balls in sprinkles until fully coated. The sprinkles add a festive crunch and visual appeal. Shake off any excess before placing them on a parchment‑lined tray to set.
- Refrigerate the finished treats for at least 30 minutes to allow them to firm up. This step makes them easier to handle and enhances the flavor as the ingredients meld.
That's it — you did it. But hold on, I've got a few more tricks that'll take this to another level...
Insider Tricks for Flawless Results
The Temperature Rule Nobody Follows
Maintaining a low, steady heat is the secret to silky chocolate. Use a digital thermometer to keep the mixture below 200°F. A quick dip of a thermometer in the center will confirm that the chocolate hasn’t overheated. If you notice the mixture thickening too quickly, add a tablespoon of cold water to reset the temperature.
Why Your Nose Knows Best
Smell the mixture as it cooks. A faint, sweet aroma indicates that the honey is caramelizing just right. If you smell a burnt note, reduce the heat immediately. Your nose is a reliable indicator of the mixture’s readiness.
The 5‑Minute Rest That Changes Everything
After folding in the Rice Krispies, let the mixture rest for 5 minutes before pressing it into the tray. This brief pause allows the cereal to absorb the liquid fully, preventing the mixture from becoming too dry. The result is a smoother, more cohesive texture.
Keep the Sprinkles Fresh
Store sprinkles in an airtight container away from moisture. If they become clumpy, break them up with a spoon before rolling the balls. Fresh sprinkles keep their crunch and color, adding to the visual appeal.
Reheat for a Crunchy Finish
If you prefer a crisp exterior, briefly microwave the finished balls at 30‑second intervals. Watch them closely; you want them to be warm but not melted. This trick gives a caramelized edge that’s extra satisfying.
Creative Twists and Variations
This recipe is a playground. Here are some of my favorite ways to switch things up:
Nutty Banana Twist
Swap the peanut butter for banana nut butter and add mashed banana to the mixture. The banana adds natural sweetness and a subtle fruitiness that complements the chocolate. This version is perfect for those who love a fruity crunch.
Minty Magic
Add a few drops of peppermint extract to the chocolate mixture before folding in the Rice Krispies. The mint gives a refreshing aftertaste that pairs well with the chocolate. Sprinkle green sprinkles to complete the holiday look.
White Chocolate Wonder
Replace half the chocolate chips with white chocolate for a creamy, sweet twist. The white chocolate melts into a silky coating that contrasts beautifully with the crunchy cereal. Add a pinch of sea salt to balance the sweetness.
Spiced Pumpkin Delight
Add a teaspoon of pumpkin pie spice to the chocolate mixture for a warm, autumnal flavor. The spice blend brings cinnamon, nutmeg, and clove notes that elevate the treat. This variation works well for early holiday celebrations.
Chocolate Covered Peanut Butter Cups
After forming the balls, dip each one in melted dark chocolate and let it set. The chocolate coating creates a mini peanut butter cup effect. Finish with a drizzle of white chocolate for added visual flair.
Almond Joy Edition
Use almond butter instead of peanut butter and add shredded coconut to the mixture. The coconut adds texture and a tropical flavor that pairs nicely with the chocolate. Sprinkle coconut flakes on top for an extra crunch.
Storing and Bringing It Back to Life
Fridge Storage
Place the finished treats in an airtight container and refrigerate for up to one week. The cold environment keeps them firm and prevents the chocolate from softening. When you’re ready to serve, let them sit at room temperature for 10 minutes to restore their flavor.
Freezer Friendly
For long‑term storage, wrap each ball individually in parchment paper and place them in a freezer bag. They will stay fresh for up to two months. Thaw at room temperature for 15 minutes before serving.
Best Reheating Method
To revive the crunch, microwave the treats on a low setting for 10–15 seconds. Alternatively, place them in a preheated oven at 300°F for 3 minutes. A tiny splash of water before reheating creates steam that restores moisture without making the treats soggy.