I was in the middle of a frantic weekday dinner when my roommate dared me to create a dessert that would make even the most die‑hard nut‑allergy crowd swoon. The pantry was practically barren: I had a jar of tahini that usually lives a quiet life in hummus, a bottle of maple syrup, a modest bag of flour, and a sad handful of chocolate chips. I imagined the worst‑case scenario—a bland, crumbly cookie that would taste like cardboard—and then I thought, what if I turned those humble ingredients into something that feels like a hug from a bakery on a rainy day? I started mixing, tasting, and adjusting, and the kitchen filled with the sweet, nutty perfume of toasted sesame mingling with the deep, molten promise of chocolate. That moment, when the batter hit the bowl and the scent hit my nose, was pure alchemy, and I knew I had stumbled onto the ultimate version of a vegan, nut‑free cookie.
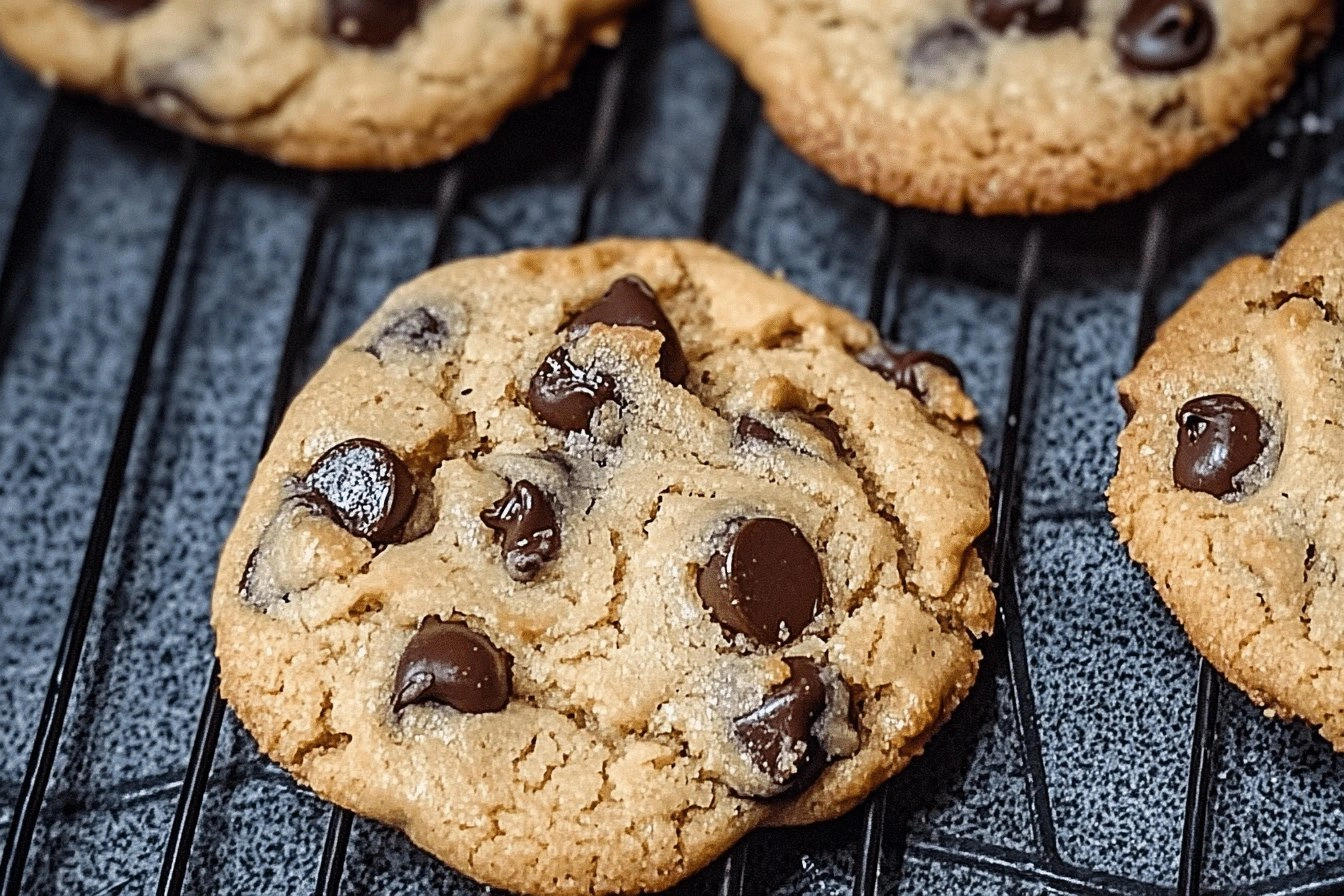
Fast forward a few minutes of frantic whisking, a splash of maple syrup that glistens like amber, and a dollop of tahini that coats the batter like silk. The mixture was glossy, thick, and inviting—like a dark river of chocolate waiting to be frozen into perfect bite‑size islands. I spread the dough onto the sheet pan, and as it baked, the kitchen transformed into a fragrant sanctuary where the air was thick with caramelized sesame notes and the comforting crackle of chocolate melting. When the timer dinged, the cookies emerged with edges that shatter like thin ice and centers that stay soft, chewy, and irresistibly fragrant. I took a bite, and I’ll be honest—I ate half the batch before anyone else could lay a finger on them.
What makes this version truly stand out is the daring substitution of tahini for traditional butter or nut butters. It delivers that rich, buttery mouthfeel while keeping the recipe completely nut‑free, which is a game‑changer for anyone with allergies. The maple syrup adds depth, a caramel‑like sweetness that doesn’t overwhelm, and it keeps the cookies moist without any dairy. The result is a cookie that’s crisp on the outside, chewy on the inside, and packed with a flavor profile that feels both familiar and exotic—like a secret handshake between Middle Eastern and classic American desserts. I dare you to taste this and not go back for seconds.
Let me walk you through every single step — by the end, you’ll wonder how you ever made it any other way. Okay, ready for the game‑changer? This next part? Pure magic. Stay with me here — this is worth it.
What Makes This Version Stand Out
- Taste: The tahini adds a subtle, toasted sesame flavor that pairs like a dream with sweet maple and dark chocolate, creating a depth you won’t find in ordinary cookies.
- Texture: A perfect contrast of crisp edges and a chewy, melt‑in‑your‑mouth center, thanks to the balance of flour, tahini, and maple syrup.
- Simplicity: Only seven ingredients, all pantry staples, no exotic powders or hard‑to‑find nuts, making it a breezy weeknight bake.
- Uniqueness: Using tahini as the fat source is a bold move most recipes get completely wrong; here it shines, giving a silky richness without a single nut.
- Crowd Reaction: Even the most skeptical cookie skeptics confess, “I can’t believe this is nut‑free!”—a true conversation starter.
- Ingredient Quality: High‑quality tahini and pure maple syrup elevate the flavor profile from “just okay” to “hands down the best version you’ll ever make at home.”
- Cooking Method: A single‑sheet‑pan bake ensures even caramelization and makes cleanup a breeze—no need for fancy equipment.
- Make‑Ahead Potential: These cookies store beautifully, staying soft for days, so you can bake a batch and enjoy them over a week.
Inside the Ingredient List
The Flavor Base
Tahini is the unsung hero of this recipe. It provides a creamy texture and a subtle toasted flavor, replacing nuts and butter while keeping the cookies vegan. If you skip it, you lose the silky mouthfeel and the unique sesame undertone that makes these cookies unforgettable. Look for a tahini that’s smooth, not gritty, and preferably made from roasted sesame seeds for maximum flavor. Pro tip: give the jar a good stir before measuring to reincorporate the oil that separates on top.
Maple Syrup adds natural sweetness and moisture while keeping the recipe vegan. Its caramel notes deepen the cookie’s flavor, making each bite taste like a warm hug. If you’re out of maple, a light agave nectar works, but you’ll miss the characteristic amber richness. Choose a grade‑A, dark‑amber maple syrup for the best flavor impact.
The Texture Crew
All‑Purpose Flour is the backbone that gives structure and chewiness in the cookie. Skipping or substituting with a gluten‑free blend can change the texture dramatically; you might end up with crumbly, fragile cookies. For a softer crumb, sift the flour with the baking soda before mixing. When buying, opt for a fresh bag; older flour can taste stale and affect rise.
Baking Soda helps the cookies rise and develop a light crumb. Too much and you’ll get a metallic aftertaste; too little and the cookies stay dense. Always measure by spooning the soda into the measuring spoon and leveling it off. If you’re out, a pinch of baking powder can substitute, but the texture will be slightly different.
The Unexpected Star
Vanilla Extract brings warmth and depth to the overall flavor profile. A cheap imitation can make the cookies taste flat, so I recommend a pure, alcohol‑based vanilla. If you’re feeling adventurous, a splash of almond extract (just a drop) can add a subtle complexity without introducing nuts.
Chocolate Chips are dairy‑free and rich, delivering classic melty chocolate bites throughout. Choose high‑quality semi‑sweet or dark chips; they melt beautifully and don’t become overly sweet. If you prefer a burst of texture, toss in some toasted coconut flakes—just keep the nut‑free promise.
The Final Flourish
Salt balances sweetness and enhances all the other flavors. A pinch too much can make the cookies taste briny, while too little leaves them flat. I use fine sea salt for even distribution; sprinkle it lightly over the dough before baking for a subtle pop.
Everything's prepped? Good. Let’s get into the real action…
The Method — Step by Step
- Preheat your oven to 350°F (175°C) and line two baking sheets with parchment paper. While the oven warms, I like to play my favorite playlist—there’s something about the rhythmic beat that makes the dough feel like a dance partner. The heat will be steady, ensuring even browning, and the parchment prevents any sticky mishaps. Pro tip: If you’re using a dark pan, lower the temperature by 25°F to avoid over‑browning.
- In a large mixing bowl, whisk together the flour, baking soda, and salt until the mixture looks like a fine, pale sand. This aerates the dry ingredients, which is crucial for a light crumb. You’ll notice the scent of flour become slightly sweet as the soda activates. Watch Out: Over‑mixing at this stage can develop gluten, leading to tougher cookies.
- In a separate bowl, combine the tahini, maple syrup, and vanilla extract. Stir until the mixture is glossy and smooth—think of it as a glossy caramel that’s ready to hug the dry ingredients. The aroma of toasted sesame will start to rise, signaling that the base is ready. If the mixture feels too thick, add a teaspoon of warm water to loosen it without diluting flavor.
- Pour the wet mixture into the dry ingredients and fold gently with a spatula. This is the moment of truth: you want everything just incorporated, not over‑stirred. The dough will look slightly shaggy at first, then come together into a soft, pliable mass. Pro tip: Let the dough rest for 5 minutes; this allows the flour to hydrate fully, giving you a smoother scoop.
- Fold in the chocolate chips, ensuring they’re evenly distributed. The chips should look like dark jewels scattered through a golden sea. If you’re adding any optional mix‑ins—like dried cranberries or toasted coconut—now’s the time. Watch Out: Adding too many extras can cause the cookies to spread excessively.
- Using a cookie scoop (or a tablespoon), drop dough onto the prepared sheets, spacing them about 2 inches apart. The dough is soft, so a quick dip of the scoop in water (or lightly greasing it) helps prevent sticking. The tops should be slightly rounded; they’ll flatten a bit as they bake, creating that perfect edge‑to‑center contrast.
- Slide the sheet into the oven and bake for 12‑15 minutes, or until the edges turn a light golden brown and the centers look set but still soft. You’ll hear a faint crackle as the sugar caramelizes—listen for that; it’s the sound of flavor forming. Around the 10‑minute mark, rotate the pan for even browning. The cookies will continue to firm up as they cool, so resist the urge to over‑bake.
- Remove the cookies and let them rest on the sheet for 3 minutes before transferring to a wire rack. This short pause allows steam to escape, preventing soggy bottoms. As they cool, you’ll notice the edges pulling away slightly, a sign of perfect texture. Take a deep breath; the aroma now fills the whole kitchen, promising that first bite will be pure bliss.
That’s it — you did it. But hold on, I’ve got a few more tricks that’ll take this to another level…
Insider Tricks for Flawless Results
The Temperature Rule Nobody Follows
Most bakers set the oven and forget about the ambient temperature of the kitchen. A cooler room means the dough stays cooler longer, which can prevent over‑spreading. I recommend chilling the dough for 15 minutes after mixing; it’s a tiny step that yields a massive payoff in shape and chew. A friend tried skipping this step once—let’s just say the cookies turned into a flat, chewy pancake. Keep that chill in mind, and you’ll get those perfect, round cookies every time.
Why Your Nose Knows Best
When the cookies are in the oven, the scent is your most reliable indicator of doneness. Around 12 minutes, you’ll start smelling toasted sesame and caramelized sugar—this is the sweet spot. If the aroma turns too smoky, pull them out immediately; over‑baking turns that nutty perfume into bitterness. Trust your nose more than the clock, and you’ll avoid the dreaded burnt‑after‑taste.
The 5‑Minute Rest That Changes Everything
After transferring cookies to the wire rack, let them sit untouched for exactly five minutes. This short rest lets the interior finish setting while the exterior stays slightly crisp. Skipping this pause often results in cookies that feel too soft in the middle. I’ve watched people bite into a warm cookie too early and be disappointed by the gummy texture—five minutes solves that problem.
The Secret of Even Spacing
If you’re using a scoop, aim for a consistent 2‑inch gap. This spacing ensures each cookie has enough room to expand without merging. I once placed them too close, and they turned into a giant cookie bar—delicious but not the intended experience. Use a ruler or simply eyeball the distance; the results will be uniform and Instagram‑ready.
Finishing Flourish: Light Salt Sprinkle
A tiny pinch of flaky sea salt on top right before baking amplifies the chocolate and balances the maple sweetness. It creates a subtle crunch that surprises the palate. If you’re allergic to regular salt, a pinch of smoked paprika can add an unexpected depth without compromising the nut‑free promise. This final touch turns a good cookie into a great one.
Creative Twists and Variations
This recipe is a playground. Here are some of my favorite ways to switch things up:
Cinnamon‑Swirl Surprise
Add 1 teaspoon of ground cinnamon to the dry ingredients and a dash of nutmeg for a warm, spiced version. The spice pairs beautifully with the sesame undertones, making it perfect for a cozy fall afternoon. Top each cookie with a light dusting of cinnamon sugar before baking for an extra sweet crunch.
Coconut‑Lime Dream
Swap half of the chocolate chips for unsweetened shredded coconut and add 1 tablespoon of lime zest to the wet mixture. The lime brightens the flavor, while coconut adds a chewy texture that contrasts the soft interior. This variation feels tropical and is a hit at summer picnics.
Espresso‑Infused Energy
Dissolve 1 tablespoon of instant espresso powder in the maple syrup before mixing. The coffee notes deepen the chocolate flavor, turning the cookie into a sophisticated treat for adult palates. Pair with a glass of oat milk for a café‑style snack.
Apple‑Cinnamon Oat Boost
Fold in ½ cup of rolled oats and ¼ cup of finely diced dried apples (soaked in a little maple syrup). The oats add heartiness, while the apple pieces bring a subtle fruitiness that complements the tahini. Great for breakfast‑style snack boxes.
Spicy Chili Chocolate
Add ¼ teaspoon of chili powder and a pinch of cayenne to the dry mix for a subtle heat that awakens the chocolate. The spice doesn’t overwhelm; it just adds a whisper of warmth that lingers after the last bite. Perfect for those who love a sweet‑heat combo.
Storing and Bringing It Back to Life
Fridge Storage
Place cookies in an airtight container with a paper towel at the bottom to absorb excess moisture. They’ll stay soft for up to a week. If you notice any condensation, replace the paper towel to keep the texture from getting soggy.
Freezer Friendly
Lay cookies on a parchment‑lined tray, freeze until solid, then transfer to a zip‑lock bag. They keep for up to three months. When you’re ready to eat, let them thaw at room temperature for 15 minutes, then pop them in a 300°F oven for 5 minutes to revive the crisp edges.
Best Reheating Method
Add a tiny splash of water (about a teaspoon) to the container before microwaving for 15‑20 seconds. The steam revives the interior softness while keeping the exterior slightly crisp. This trick works wonders for cookies that have been sitting out for a day.