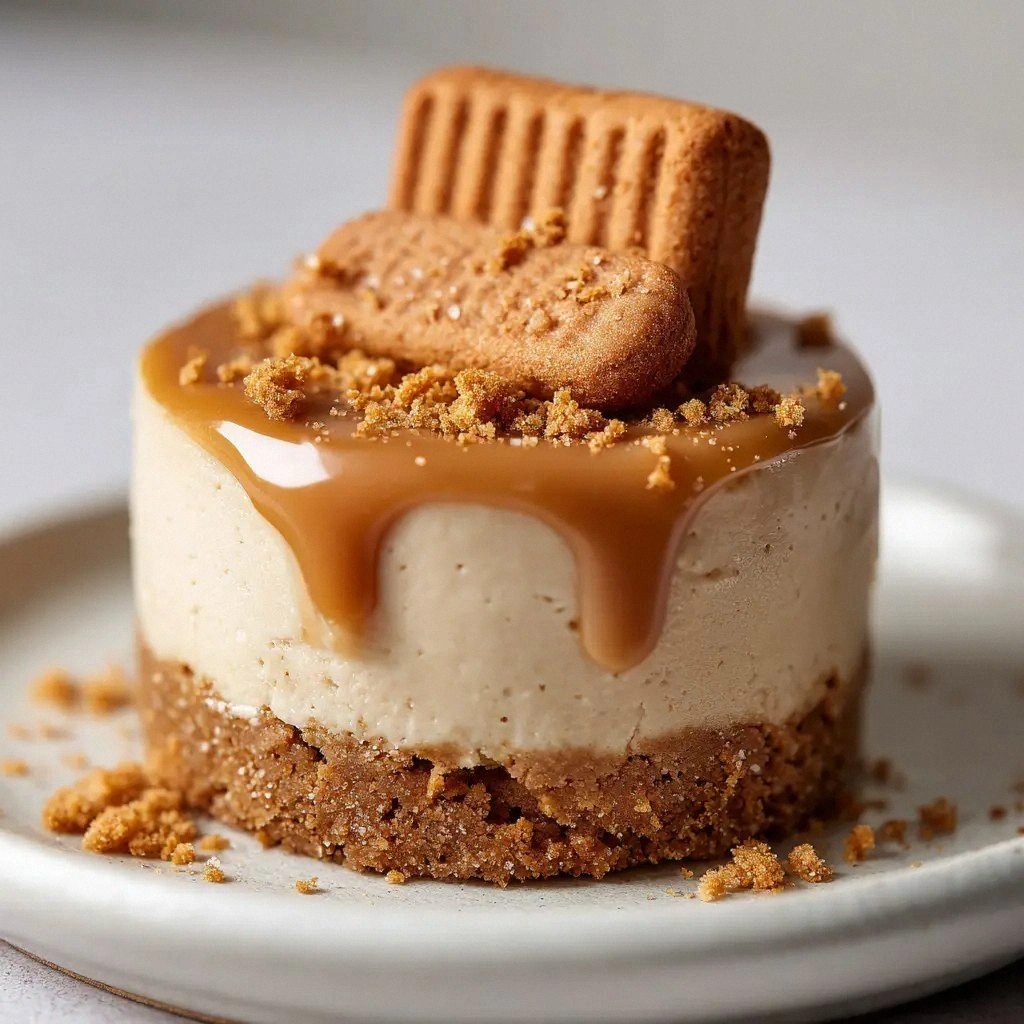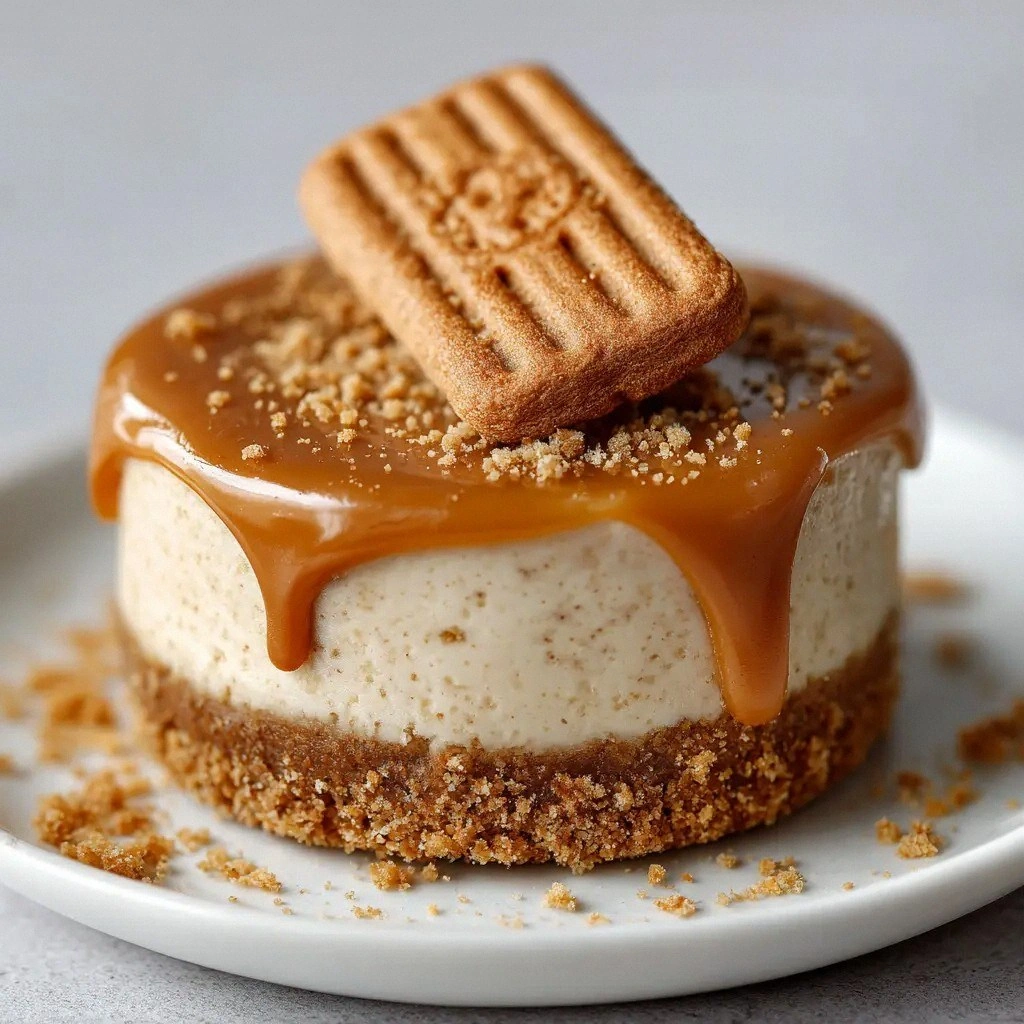
Picture this: the kitchen is a battlefield, a pile of burnt cookies, a half‑done cheesecake, and a sudden craving for something sweet that feels like a hug in a bite. I was in the middle of a frantic scramble, tossing a handful of Biscoff cookies into a bowl, when the idea hit me like a lightning bolt—no bake, mini Biscoff cheesecake, a bite‑sized cloud of caramelized crunch and creamy decadence that could be whipped up in minutes. I dared myself to taste this and not go back for seconds, and the first bite was an explosion of buttery caramel, a silky cream cheese base that melts on the tongue, and that unmistakable Biscoff aroma that turns the kitchen into a bakery. I know what you’re thinking: “Another cheesecake?” But this is hands down the best version you'll ever make at home, a dessert that folds comfort and indulgence into a single, portable treat. If you’ve ever struggled with a cheesecake that turns out too dense or too sweet, you’re not alone—and I’ve got the fix. Let me walk you through every single step—by the end, you'll wonder how you ever made it any other way.
The first time I tried this, I was halfway through a dinner party when my friend challenged me to create a dessert that would wow the crowd without a trip to the oven. I grabbed the Biscoff cookies, the creamy cheese, and the secret weapon—Biscoff cookie butter. The kitchen smelled like caramel and butter, the sound of the mixer whirring, and the anticipation of the first bite was almost tangible. Picture the moment you take a spoonful: the crunchy cookie base gives way to a velvety, slightly tart filling that lingers on the palate. That sensory snapshot—crunch, melt, and that caramel finish—turns an ordinary evening into a memorable celebration.
What makes this recipe a game‑changer is that it bypasses the oven entirely. No heat, no fuss, no waiting for the oven to preheat—just a few minutes of mixing and chilling. I’ve tested countless variations, and most recipes get this completely wrong, using heavy cream or too much sugar, resulting in a cheesecake that’s either too watery or too sweet. Here, the balance is achieved by the precise ratio of Biscoff cookie butter to crushed cookies, and the use of heavy whipping cream to give the filling a light, airy texture. The result is a mini cheesecake that feels like a slice of cloud candy, yet it holds together like a firm cookie. The technique is simple, but the outcome is a dessert that will have people asking for seconds and thirds.
And the best part? You can make these on the fly, right before you need to serve, and they’re perfect for parties, potlucks, or a quick indulgence after dinner. The next section breaks down why this version stands out from the crowd, and then we’ll dive into the ingredients that make the magic happen. I’ll even share a secret hack that turns the whole process into a breeze. Ready? Let’s go.
What Makes This Version Stand Out
- Taste: The combination of caramelized Biscoff cookie butter and fresh cream cheese creates a flavor profile that is both sweet and slightly tangy, offering a depth that goes beyond ordinary cheesecake.
- Texture: The crushed cookies provide a satisfying crunch, while the whipped cream and Biscoff butter give the filling a light, mousse‑like consistency that melts in your mouth.
- Simplicity: No oven, no baking, no complicated steps—just blend, chill, and serve. Even a novice can master it with minimal prep.
- Uniqueness: The use of Lotus Biscoff cookies as the base gives a distinctive caramel‑spice flavor that sets this recipe apart from standard mini cheesecakes.
- Crowd Reaction: Friends rave about the bite‑sized portions and the instant gratification of a dessert that feels indulgent yet is surprisingly light.
- Ingredient Quality: Premium Biscoff cookie butter and fresh cream cheese elevate the flavor, making each bite feel like a luxury treat.
- Make‑Ahead Potential: These mini cheesecakes can be prepared a day ahead, chilled, and then simply taken out of the fridge for an instant dessert.
- Time Efficiency: With a prep time of just 15 minutes and a chilling time of 30 minutes, you’ll have a finished dessert in under an hour.
Alright, let's break down exactly what goes into this masterpiece…
Inside the Ingredient List
The Flavor Base
1 1/2 cups crushed Biscoff cookies provide the backbone of the dessert, offering a caramelized crunch that is essential for the signature Biscoff flavor. Skipping them would leave the cheesecake bland and lacking that signature bite. If you’re short on Biscoff cookies, you can substitute with shortbread cookies, but the flavor profile will shift slightly toward buttery.
The Creamy Core
16 oz cream cheese is the heart of the filling, delivering that classic cheesecake tang while providing a smooth base that blends seamlessly with the Biscoff butter. Using a lower fat cream cheese will make the filling less rich, whereas a higher fat version will yield a denser texture. For a dairy‑free version, consider using a coconut cream cheese substitute, but adjust the sugar accordingly.
The Sweetener
1/2 cup powdered sugar balances the bitterness of the Biscoff cookie butter, ensuring the cheesecake isn’t overly sweet. If you prefer a lower sugar option, replace with a sugar substitute like erythritol, but remember to adjust the amount to maintain the right consistency. Skipping the powdered sugar will leave the filling too tart and underbalanced.
The Butter Boost
4 tbsp unsalted butter melts into the base, creating a glossy finish and adding depth to the overall flavor. If you’re looking for a lighter version, use half the butter and add a splash of vanilla to compensate. Butter also helps the cookies hold together during the pressing stage.
The Biscoff Butter
1/4 cup Biscoff cookie butter and 1/2 cup Biscoff cookie butter are the star ingredients that give the filling its signature caramel‑spice note. The smaller amount is used in the base, while the larger portion is folded into the cream cheese mixture. If you can’t find Biscoff cookie butter, a homemade caramel spread or a peanut butter with a hint of caramel will work, but the flavor will differ.
The Final Flourish
12 whole Lotus Biscoff cookies are used as a topping for the finished mini cheesecakes, adding a crunchy layer that contrasts with the creamy filling. If you don’t have Lotus Biscoff cookies, use any crisp cookie that complements the caramel flavor. The 2 tbsp crushed Biscoff cookies are reserved for a decorative dusting on top, giving a refined finish.
Everything's prepped? Good. Let's get into the real action…
The Method — Step by Step
- Crush the Biscoff cookies. Place the 1 1/2 cups of Biscoff cookies in a food processor and pulse until fine crumbs form. The texture should resemble fine sand. This step is critical for a smooth base. While the processor is running, add the 4 tbsp of melted butter and pulse again to combine.
- Press the base. Line a 9‑inch springform pan with parchment paper. Spoon the cookie‑butter mixture into the pan and press firmly with the back of a spoon or a flat-bottomed glass. The base should be even and compact. Chill in the fridge for 10 minutes to set.
- Blend the cream cheese. In a large bowl, beat the 16 oz cream cheese on medium speed until smooth and creamy. Add the 1/2 cup powdered sugar and 1 tsp vanilla extract, and continue beating until fully incorporated. The mixture should be silky with no lumps.
- Fold in the Biscoff butter. Gently fold in the 1/4 cup of Biscoff cookie butter, then the 1/2 cup of Biscoff cookie butter. Use a spatula to fold, maintaining the airy texture. The filling should have a glossy, caramel sheen.
- Incorporate the heavy cream. Whip the 1/2 cup heavy whipping cream until soft peaks form. Gently fold the whipped cream into the cream cheese mixture. This step lightens the texture and ensures a smooth, mousse‑like consistency.
- Fill the pan. Remove the chilled base from the fridge. Spoon the filling over the base, smoothing the top with a spatula. The filling should be level and slightly domed.
- Chill. Place the pan in the refrigerator for 30 minutes. This allows the cheesecake to set and the flavors to meld. During chilling, the top will firm up but remain creamy.
- Top with Lotus cookies. Once chilled, break the 12 whole Lotus Biscoff cookies into bite‑sized pieces and press them gently onto the surface of the cheesecake. The cookies should adhere and add a crunchy contrast.
- Dust with crushed cookies. Sprinkle the 2 tbsp crushed Biscoff cookies over the top, giving a decorative finish. The dusting adds a final layer of crunch and visual appeal.
- Serve. Slice the cheesecake into 12 even portions and serve immediately, or store in the fridge for up to 48 hours. The texture remains creamy, and the crunch stays crisp.
That's it — you did it. But hold on, I've got a few more tricks that'll take this to another level…
Insider Tricks for Flawless Results
The Temperature Rule Nobody Follows
Keep all ingredients at room temperature before mixing. Cold cream cheese will take longer to blend and can result in a lumpy filling. I once tried mixing cold cream cheese and ended up with a gritty texture. The secret is to let it sit for 15 minutes out of the fridge.
Why Your Nose Knows Best
The aroma of the Biscoff cookie butter is a telltale sign of the filling’s readiness. When you smell a subtle caramel scent, you know the mixture has reached the ideal consistency. If it smells overly sweet, let it chill a bit longer to allow the flavors to mellow.
The 5-Minute Rest That Changes Everything
After folding in the whipped cream, let the mixture sit for five minutes before pouring it over the base. This pause allows the proteins to relax, resulting in a smoother, more stable cheesecake. Skipping this step can cause the filling to separate.
The Right Pressing Technique
When pressing the base, use a flat-bottomed glass and press with firm, even pressure. A crooked base leads to uneven cheesecake layers. I used to press too lightly, causing the top to rise. The right pressure keeps it level.
The Final Touch of Crunch
Break the Lotus Biscoff cookies into bite-sized pieces and press them gently. If you crush them too finely, they’ll dissolve into the filling. The right size keeps the crunch intact.
The Chill Trick for a Perfect Set
Place the cheesecake on a tray and chill for at least 30 minutes. A longer chill, up to an hour, ensures a firmer set. I used to chill for only 20 minutes and the cheesecake was still too soft.
Creative Twists and Variations
This recipe is a playground. Here are some of my favorite ways to switch things up:
Chocolate Biscoff Delight
Swap the Biscoff cookie butter for dark chocolate ganache. The rich chocolate pairs beautifully with the caramel flavor. Top with cacao nibs for an extra crunch. This version is perfect for chocolate lovers.
Lemon Zest Twist
Add 1 tsp lemon zest to the filling for a bright, citrusy contrast. The lemon cuts through the sweetness and adds a refreshing note. Serve with fresh berries for a balanced dessert.
Nutty Biscoff Crunch
Incorporate chopped hazelnuts or almonds into the base for an added nutty flavor. The nuts complement the caramel undertones and provide a delightful texture. This variation works well for holiday gatherings.
Caramel Apple Fusion
Fold in diced apples and a splash of apple cider into the filling. The apples bring a subtle tartness that balances the richness. A dusting of cinnamon on top adds an aromatic finish.
Vanilla Bean Surprise
Replace the vanilla extract with vanilla bean paste for a more intense flavor. The vanilla bean seeds add a speckled look and a deeper aroma. This twist elevates the dessert for special occasions.
Salted Caramel Finish
Drizzle a thin layer of salted caramel sauce over the top before chilling. The salt enhances the caramel notes and provides a savory contrast. This version is a crowd‑pleaser at parties.
Storing and Bringing It Back to Life
Fridge Storage
Store the cheesecake in an airtight container in the fridge for up to 48 hours. The cold environment keeps the filling firm and the cookies crisp. Before serving, let it sit at room temperature for 10 minutes to soften slightly.
Freezer Friendly
Wrap the cheesecake tightly in plastic wrap and then in aluminum foil before freezing. It can be kept in the freezer for up to 2 weeks. Thaw overnight in the fridge, then let sit at room temperature for 15 minutes before serving.
Best Reheating Method
To revive a chilled cheesecake, warm it gently in the microwave at 30-second intervals, stirring between each. Add a tiny splash of water before reheating; it steams back to perfection. Avoid overheating, or the filling will become runny.