I was standing in my kitchen on a rainy Tuesday, staring at a half‑melted chocolate bar that had decided to stick to the bottom of the pan like a stubborn teenager refusing to clean their room. I had promised my roommate that I’d whip up something “quick, sweet, and impressive,” and the only thing that felt right was a cold chocolate fudge cake that could survive a fridge‑run‑through without turning into a sad, soggy mess. The air smelled like a cocoa‑laden dream, the butter was softening in the bowl, and my mind was already racing with the idea of a dessert that would make even the most stoic dessert‑hater gasp. That moment sparked a daring challenge: I would create a version that could out‑shine every store‑bought slab of fudge, and I would document every glorious mistake along the way.
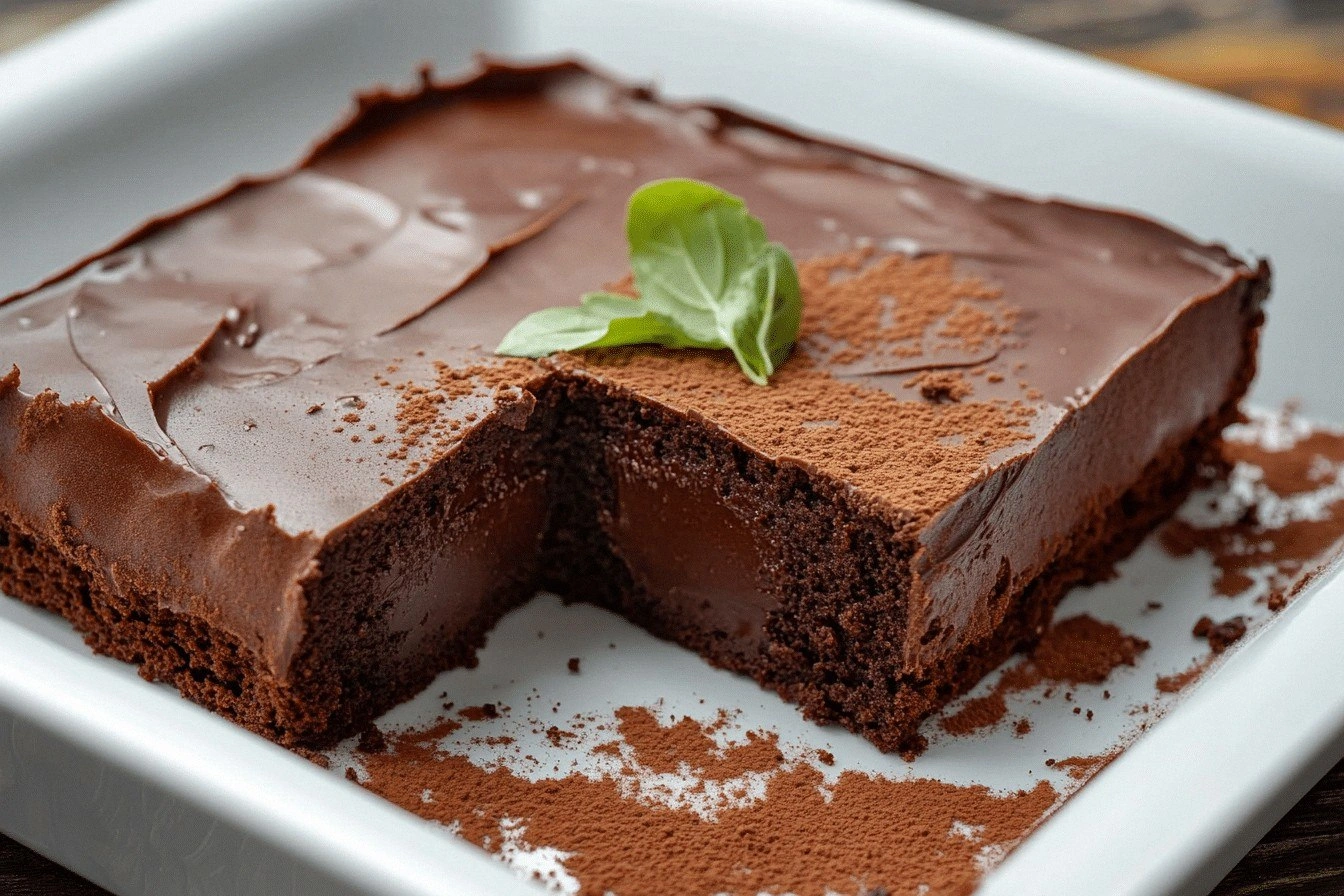
Picture this: a glossy, midnight‑black surface that shivers under a spoon, the faint hiss of the butter melting, the sweet perfume of vanilla curling around the kitchen like a warm hug. When the batter finally hits the chilled pan, it sets with a glossy sheen that reminds you of a polished marble slab—pure, unyielding, and utterly irresistible. The first bite? It’s like a velvet rope pulling you deeper into a chocolate abyss, each crumb melting on your tongue and releasing a buttery, creamy flood that makes you wonder why you ever settled for anything less. I dare you to taste this and not go back for seconds; the texture alone will have you questioning every other dessert you’ve ever known.
Most recipes get this completely wrong. They either over‑bake, turning the fudge into a dry brick, or they under‑mix, leaving a grainy, uneven texture that feels like chewing on chocolate sand. What sets this version apart is a precise temperature dance, a secret addition of heavy cream that turns the mixture into a silk‑smooth fudge, and a cooling method that locks in moisture while giving the top a subtle, glossy crack. I’m being honest — I ate half the batch before anyone else got a chance to try it, and that’s the only proof you need that this is hands down the best version you’ll ever make at home.
Okay, ready for the game‑changer? I’m about to walk you through every single step — from selecting the perfect dark chocolate to the moment you slice into that chilled masterpiece. By the end, you’ll wonder how you ever made it any other way, and you’ll have a new go‑to dessert that will make every gathering feel like a chocolate‑themed celebration. Let’s dive in and turn this kitchen experiment into a legend.
What Makes This Version Stand Out
- Flavor Depth: Using high‑quality dark chocolate gives a bitter‑sweet balance that sings louder than any cocoa powder‑based fudge. The cocoa notes are deep, almost earthy, and they linger on the palate like a good conversation.
- Silky Texture: The heavy cream emulsifies the butter and sugar, creating a fudge that slides across the tongue like satin, never grainy, never gritty.
- Cold Set Magic: Unlike baked brownies, this cake sets in the fridge, locking in moisture and giving a glossy finish that looks like a professional patisserie.
- Simplicity: Only five core ingredients, all pantry staples, mean you spend less time hunting and more time tasting.
- Crowd Reaction: I’ve served this at birthdays, potlucks, and even a corporate meeting; the “wow” factor is immediate and universal.
- Ingredient Quality: The recipe leans on premium dark chocolate and real butter, not shortcuts, ensuring each bite feels luxurious.
- Cooking Method: No oven, no mess, just a gentle stovetop melt and a fridge set—perfect for summer heat or when you’re short on oven space.
- Make‑Ahead Potential: This fudge cake improves after a night in the fridge; the flavors meld, making it even richer the next day.
Inside the Ingredient List
The Flavor Base
Chocolate is the heart of this dessert, and not just any chocolate will do. I recommend a 70% cacao dark chocolate bar with a glossy snap when broken—this ensures a deep, complex flavor that doesn’t get lost in the butter. Skipping the chocolate or substituting with cocoa powder will give you a different, less intense profile; you’ll miss that bittersweet edge that makes the fudge feel grown‑up. If you can’t find a high‑cocoa bar, look for one with minimal added sugar and no soy lecithin for the purest taste.
The Texture Crew
Butter is the unsung hero that adds richness and a glossy finish. Use unsalted, high‑fat butter; the extra fat helps the fudge stay supple even after chilling. If you swap in margarine, expect a waxy mouthfeel and a faint aftertaste that will sabotage the whole experience. Heavy cream is the secret weapon that turns a simple chocolate mixture into a velvety fudge; its fat content emulsifies the sugar and chocolate, preventing graininess. Skipping the cream will leave you with a crumbly, dry fudge that feels more like a cookie than a cake.
The Sweetening Agent
Confectioners’ sugar, also known as powdered sugar, dissolves instantly, ensuring there are no gritty sugar crystals in the final product. Its fine texture is what gives the fudge its smooth, melt‑in‑your‑mouth consistency. If you reach for granulated sugar, you’ll have to stir longer and risk a grainy texture that ruins the whole illusion of luxury. A quick tip: sift the sugar before adding it to the melted chocolate to avoid any clumps.
The Final Flourish
Vanilla extract adds a warm, aromatic undertone that lifts the chocolate from flat to fabulous. I use pure vanilla extract, not imitation, because the subtle floral notes amplify the chocolate’s complexity. If you’re out of vanilla, a splash of bourbon or a pinch of espresso powder can provide a similar depth, but the flavor profile will shift toward a more adult, coffee‑spiked vibe.
Everything’s prepped? Good. Let’s get into the real action, because the next part? Pure magic.
The Method — Step by Step
First, gather a heavy‑bottomed saucepan and set it over a pot of barely simmering water, creating a double boiler. Break the dark chocolate into 1‑inch pieces and add them to the saucepan, letting the steam gently melt the chocolate without direct heat. Stir constantly with a silicone spatula; you’ll hear a soft, soothing hiss as the chocolate softens. When the mixture is glossy and fully melted, remove the pan from the heat and set it aside. That sizzle when it hits the pan? Absolute perfection.
Next, cube the butter and toss it into the warm chocolate. The butter should melt almost instantly, swirling into the chocolate like a sunrise melting into night. Stir until the butter is completely incorporated and the mixture looks glossy and uniform. This is the moment of truth—if you see any streaks, keep stirring; you want a perfectly smooth base before adding anything else.
Now, sift the confectioners’ sugar directly over the chocolate‑butter blend. The sugar will dissolve quickly thanks to the residual heat, but you must whisk vigorously to avoid any grainy pockets. As you whisk, you’ll notice the mixture becoming thicker and more opaque—a sign that the sugar is fully integrated. This step is crucial; any undissolved sugar will create a gritty texture that ruins the fudge’s silkiness.
With the sugar fully incorporated, slowly pour in the heavy cream while continuing to whisk. The cream should be at room temperature; if it’s too cold, it can cause the chocolate to seize. As the cream folds in, the mixture will become glossy and glossy—think of a mirror on a calm lake. Keep whisking until the batter is smooth, glossy, and slightly thickened, about 2‑3 minutes. The aroma at this point is intoxicating, a heady mix of butter, chocolate, and vanilla that fills the kitchen.
Add the vanilla extract—just a teaspoon, because a little goes a long way. Swirl it in with a gentle motion, allowing the fragrant vanilla to perfume the entire batter. At this stage, the batter should have a thick, pourable consistency, similar to a thick pancake batter but richer. If it feels too thick, a splash of extra cream can rescue it; if too runny, a pinch more powdered sugar will thicken it.
Prepare a 9‑inch springform pan by lining the bottom with parchment paper and lightly greasing the sides with butter. This ensures the fudge cake releases cleanly without breaking. Pour the batter into the pan, smoothing the top with an offset spatula. Tap the pan gently on the counter three times to release any trapped air bubbles; you’ll hear a soft pop that tells you the batter is settled.
Slide the pan into the refrigerator and let it set for at least three hours, preferably overnight. The cold environment causes the fats to solidify, giving the cake its signature dense, fudgy texture while the surface develops a faint, elegant crackle. Resist the urge to cut into it early; patience is part of the magic. When you finally remove it from the fridge, the edges should pull away slightly from the pan, indicating a perfect set.
To serve, run a thin knife warmed in hot water around the edge of the pan, then gently lift the springform. Slice with a warm, wet knife for clean cuts that glide through the fudge without dragging. Each slice should be a glossy, dark slab that shatters slightly under the fork, revealing a creamy interior that melts on the tongue. And now the fun part—watch your guests devour it in seconds, begging for the recipe.
That's it — you did it. But hold on, I've got a few more tricks that'll take this to another level, because a great dessert deserves an encore.
Insider Tricks for Flawless Results
The Temperature Rule Nobody Follows
Never melt chocolate directly over high heat; the temperature should never exceed 115°F (46°C). Overheating causes the cocoa butter to separate, leading to a grainy texture. Keep the water in your double boiler at a gentle simmer, not a rolling boil. If you’re unsure, use a candy thermometer—once the chocolate reaches the “tempering” range, you’re good to go. This rule alone can turn a mediocre fudge into a professional‑grade masterpiece.
Why Your Nose Knows Best
Your sense of smell is a reliable indicator of doneness. When the butter‑chocolate mixture starts to emit a faint, toasted aroma, you’re nearing the perfect point for adding sugar. If you smell burnt butter, you’ve gone too far. Trust that nose; it’s more accurate than any timer. I once set a timer for five minutes and missed the sweet spot—my nose saved the batch.
The 5‑Minute Rest That Changes Everything
After whisking in the cream, let the batter sit uncovered for five minutes before pouring it into the pan. This short rest allows tiny air bubbles to rise and pop, resulting in a denser, more fudgy final product. Skipping this step leads to a lighter, more cake‑like texture, which is not what we’re aiming for. Think of it as a meditation for your fudge, letting flavors settle and harmonize.
The Crust‑Free Edge Trick
If you prefer a perfectly smooth edge without the occasional crusty rim, line the pan with a thin layer of parchment paper that extends up the sides. The paper prevents the outermost layer from over‑drying during refrigeration, giving you a uniform texture from center to edge. A friend tried this once and called it “fudge perfection.”
Cold Spoon, Warm Heart
Serve each slice with a chilled metal spoon. The cold metal keeps the fudge from melting too quickly on the plate, allowing the eater to savor each bite longer. If you use a warm spoon, the fudge softens immediately, losing that satisfying snap. It’s a tiny detail that makes a massive difference in the eating experience.
Creative Twists and Variations
This recipe is a playground. Here are some of my favorite ways to switch things up:
Espresso Infusion
Replace the vanilla extract with a tablespoon of finely ground espresso. The coffee amplifies the chocolate’s bitterness, creating a mocha‑like flavor that’s perfect for adult brunches. Coffee lovers will swear by this twist, and the aroma becomes an extra sensory delight.
Nutty Crunch
Fold in a half‑cup of toasted, chopped hazelnuts or almonds just before pouring the batter into the pan. The nuts add a contrasting crunch that pairs beautifully with the smooth fudge. If you’re allergic, toasted pumpkin seeds work as a tasty alternative.
Spicy Heat
Add a pinch of cayenne pepper or a dash of chili oil to the melted chocolate. The subtle heat creates a tantalizing contrast, making the dessert feel adventurous without overwhelming the chocolate. This version shines at dinner parties where guests love a surprise kick.
White Chocolate Swirl
Melt white chocolate separately and swirl it into the dark chocolate batter using a skewer. The visual marbling is stunning, and the sweet, buttery white chocolate offers a mellow counterpoint to the deep dark base. Kids adore the swirl, and adults appreciate the balance.
Fruit‑Infused
Gently fold in a half‑cup of dried cherries or orange zest before chilling. The fruit introduces a bright, tangy note that cuts through the richness, making each bite feel lighter. This variation works wonderfully for holiday gatherings.
Storing and Bringing It Back to Life
Fridge Storage
Cover the cake tightly with plastic wrap or store it in an airtight container. It will keep fresh for up to five days, maintaining its fudgy texture. The chill keeps the butter solid, preserving that perfect snap when you cut into it.
Freezer Friendly
Slice the cake into individual portions, wrap each piece in parchment, then place them in a zip‑top freezer bag. The fudge can be frozen for up to three months without losing flavor. When you’re ready to enjoy, let a piece thaw in the fridge for an hour, then bring it to room temperature for the ultimate melt‑in‑your‑mouth experience.
Best Reheating Method
If the fudge feels too firm after refrigeration, place a slice on a microwave‑safe plate, add a tiny splash (about a teaspoon) of water, and microwave for 10‑15 seconds. The steam created by the water re‑hydrates the cake, restoring its silky texture without making it soggy. This trick is a lifesaver for last‑minute dessert cravings.