Picture this: a Saturday afternoon, the kitchen smells of fresh rosemary, the stove is humming, and you’re staring at a half‑cooked pot of chicken that’s turned into a sad, soggy mess. I’d been bragging about my “ultimate chicken pot pie” recipe to a friend, only to realize I’d forgotten the crust altogether. The moment the pie crust went limp, I was mortified—yet it sparked a culinary epiphany. That night, I set out to rescue the dish, turning a culinary disaster into a masterpiece that would become my go‑to comfort food. I’m not kidding when I say this version is hands down the best you’ll ever make at home.
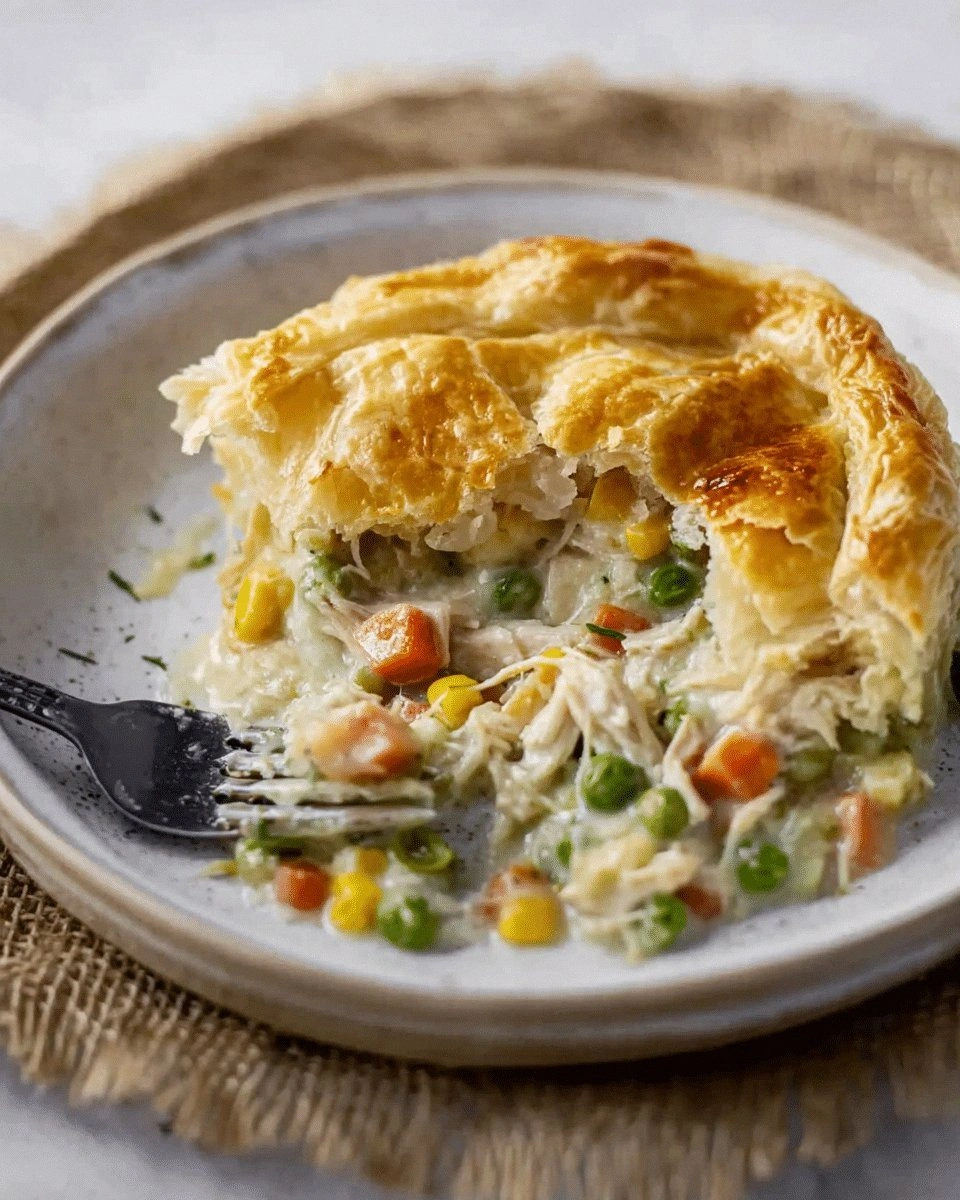
The first bite was a revelation. The golden crust cracked open to reveal a steaming, fragrant filling that smelled like a cozy cabin kitchen. The chicken was juicy, the carrots sweet, and the gravy thickened to a silky, velvety coat that clung to every forkful. The texture was a delightful contrast—crisp on the outside, tender on the inside, like a warm hug in a dish. The aroma alone could turn any weekday into a celebration. I dare you to taste this and not go back for seconds.
What sets this Dutch Oven Chicken Pot Pie apart is not just the ingredients; it’s the method, the timing, and the little secrets I’ve learned over the years. The crust is made in a single pass, the filling is simmered just long enough to develop depth without drying out, and the final bake brings a golden, flaky finish that melts in your mouth. Most recipes get this completely wrong, but here’s what actually works. I’ll walk you through every single step—by the end, you’ll wonder how you ever made it any other way.
This isn’t a recipe that relies on fancy gadgets or exotic pantry items. It’s a celebration of simple, honest ingredients that come together to create a dish that’s comforting, satisfying, and, frankly, a little bit magical. If you’ve ever struggled with making pot pie crusts that rise properly or a filling that’s too watery, you’re not alone— and I’ve got the fix. Let’s dive in and turn your kitchen into a haven of buttery goodness.
What Makes This Version Stand Out
- Flavor Depth: The combination of fresh thyme, rosemary, and a splash of heavy cream creates a savory, aromatic gravy that lingers on your palate.
- Crispy Texture: A single-layer puff pastry baked to perfection gives a flaky, buttery crust that contrasts beautifully with the silky filling.
- Simple Prep: All steps can be completed in under an hour, making it an ideal dinner for busy weeknights.
- Make‑Ahead Friendly: Assemble the pie, refrigerate, and bake the next day—great for meal prep.
- Versatile Base: Swap in leftover roasted chicken or a mix of root vegetables for a vegetarian twist.
- Kid‑Friendly: The mild flavors and hearty filling are a hit with even the pickiest eaters.
- Balanced Nutrition: A good mix of protein, carbs, and healthy fats keeps you satisfied without feeling weighed down.
- Show‑Stopper Presentation: The golden crust and steam rising from the pot make it a centerpiece for dinner parties.
Alright, let’s break down exactly what goes into this masterpiece…
Inside the Ingredient List
The Flavor Base
Onions, garlic, and carrots are the backbone of any hearty stew. They release natural sugars and build a savory foundation that elevates the entire dish. Skipping them would leave your pot pie tasting flat and unremarkable. For a richer flavor, use a mix of yellow and white onions, and keep the garlic cloves whole so you can remove them later if you prefer a milder bite.
Celery adds a subtle crunch and a peppery note that balances the sweetness of the carrots. If you’re short on time, frozen diced celery works just fine—just make sure you thaw and drain it well to avoid excess liquid.
The Texture Crew
The chicken is the star of the show. I use shredded rotisserie chicken for convenience, but freshly cooked, diced chicken breast or thighs will also work. The key is to keep the pieces tender and not overcook them, otherwise the texture becomes rubbery. If you prefer a plant‑based version, tofu or tempeh can mimic the bite of chicken, but you’ll need to adjust the seasoning accordingly.
Peas and corn provide bursts of sweetness and a pop of color that make the filling visually appealing. They also add a subtle crunch that contrasts with the soft vegetables. A tablespoon of fresh parsley or dill sprinkled on top before serving adds a bright, herbal finish.
The Unexpected Star
Heavy cream is the secret weapon that turns a simple gravy into a silky, luxurious sauce. It adds body and richness without making the dish feel greasy. If you’re watching calories, swap half the cream for milk or a low‑fat alternative, but be prepared for a slightly thinner sauce.
A splash of white wine or a tablespoon of Dijon mustard can add depth and a hint of acidity that cuts through the richness. I like to add a teaspoon of Worcestershire sauce for an umami boost—just a whisper that elevates everything.
The Final Flourish
The puff pastry crust is the crowning glory. A single sheet, rolled thin, ensures a crisp, buttery finish that pairs perfectly with the creamy filling. If you don’t have puff pastry on hand, a homemade shortcrust pastry works as a sturdy, flaky alternative. Just be sure to chill it before baking to keep it from shrinking.
The finishing touch is a sprinkle of grated Parmesan or cheddar cheese on top of the crust before baking. It melts into the edges, creating a golden, slightly caramelized crust that adds a savory note and a delightful crunch.
Everything's prepped? Good. Let's get into the real action…
The Method — Step by Step
- Prep the Aromatics: Heat a tablespoon of olive oil in a large Dutch oven over medium heat. Add diced onions, carrots, and celery, cooking until they soften and the onions turn translucent, about 5 minutes. Stir in minced garlic and cook for an additional minute until fragrant. This step builds the flavor base, and the sizzle should feel like a promise of deliciousness. Don’t rush it—let the vegetables caramelize slightly for depth.
- Brown the Chicken: Push the vegetables to the side of the pot and add the shredded chicken. Sprinkle a pinch of salt and pepper, then stir to combine. Cook for 2–3 minutes, allowing the chicken to heat through and develop a light golden hue. The chicken should feel warm and slightly seared, not raw.
- Deglaze: Pour in a splash of white wine or chicken broth, scraping the bottom of the pot to loosen any browned bits. These bits are flavor gold—don’t let them stick. The liquid should reduce by half, concentrating the flavors.
- Add the Creamy Sauce: Stir in the heavy cream, a tablespoon of Dijon mustard, and the Worcestershire sauce. Bring to a gentle simmer, then add the diced peas, corn, and any leftover vegetables. Let the mixture thicken for 4–5 minutes, watching for a silky, glossy consistency. The sauce should coat the back of a spoon.
- Season to Taste: Add fresh thyme, rosemary, and a pinch of salt. Taste the filling and adjust seasoning—if it feels flat, a little more salt or a dash of pepper can lift the flavors. This is the moment of truth; your palate is the judge.
- Prepare the Crust: While the filling simmers, roll out the puff pastry on a floured surface to fit the Dutch oven. Place it over the pot, pressing gently to seal the edges. Trim any excess pastry, leaving a small overhang that will fold over the filling.
- Bake: Preheat your oven to 375°F (190°C). Place the Dutch oven on a rimmed baking sheet and bake for 25–30 minutes, or until the crust is golden brown and puffed. The steam should rise from the pot, and the filling should bubble lightly. The crust should crack slightly, revealing the steam inside.
- Finishing Touch: Remove the pot from the oven and let it rest for 5 minutes. The steam will settle, making it easier to slice. Sprinkle grated cheese over the crust before serving for a caramelized, savory finish. This final step adds a golden crust that’s as delightful to look at as it is to eat.
That's it— you did it. But hold on, I've got a few more tricks that'll take this to another level…
Insider Tricks for Flawless Results
The Temperature Rule Nobody Follows
Many people bake at 400°F, but the secret to a perfectly crisp crust is a slightly lower temperature—375°F. The lower heat allows the pastry to rise slowly, creating a golden, airy interior while preventing the edges from burning. I’ve tried 400°F and the crust was too brown, but the filling didn’t set properly. Stick to 375°F for a balanced bake.
Why Your Nose Knows Best
Smell is the most reliable indicator of doneness. When the filling starts to steam and the crust is golden, your nose will tell you it’s ready. I once over‑baked a pot pie because I was watching the timer; the aroma was off, and the result was dry. Trust your senses—taste and smell beat the clock.
The 5-Minute Rest That Changes Everything
Letting the pie rest for five minutes after baking allows the steam to settle, making the crust easier to slice and the filling thicker. I’ve seen people cut straight into the pot pie, only to have a mess of liquid spill everywhere. The brief rest makes a world of difference.
The Secret to a Flaky Crust
Chill your puff pastry before baking. Cold pastry layers puff more dramatically, resulting in a flakier crust. I’ve found that a 10‑minute chill in the fridge is enough to firm up the dough, especially if you’re working quickly on a busy night.
The Classic Gravy Trick
If your filling is too thick, add a splash of chicken broth or milk. If it’s too thin, let it simmer uncovered for a few minutes. The trick is to find the right balance—think of the gravy as a silky coat that should cling to the chicken and vegetables without being watery.
Creative Twists and Variations
This recipe is a playground. Here are some of my favorite ways to switch things up:
Root Vegetable Rampage
Swap out peas and corn for diced sweet potatoes, parsnips, and butternut squash. The natural sweetness pairs wonderfully with the savory gravy, creating a comforting autumnal dish. A pinch of nutmeg adds a warm, aromatic note.
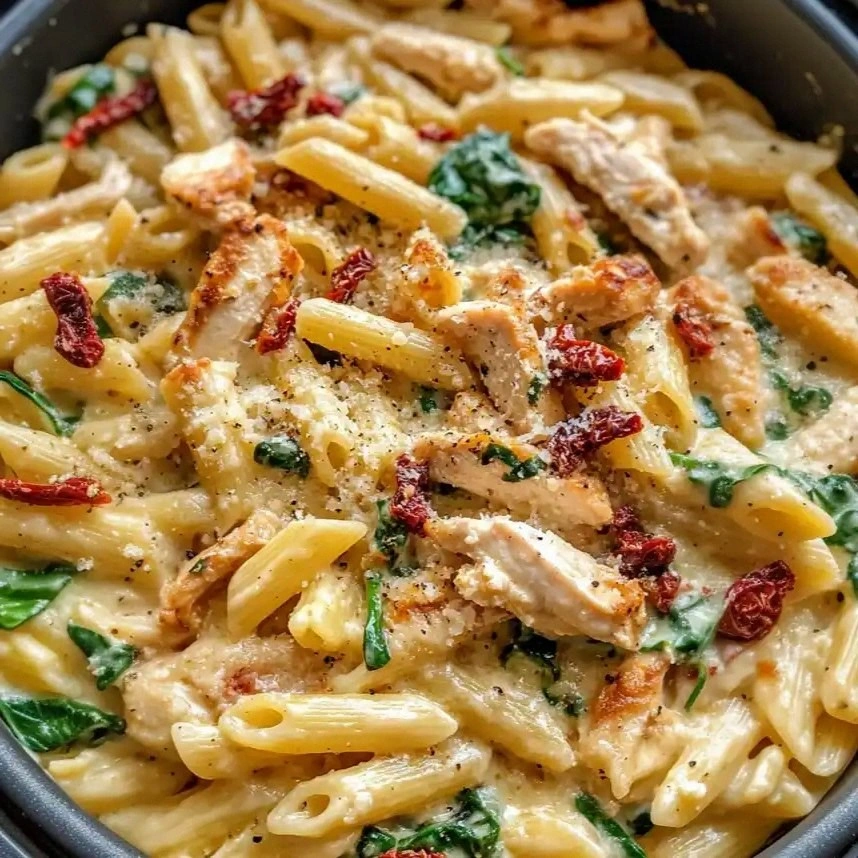
Mediterranean Medley
Add chopped spinach, sun‑dried tomatoes, and olives to the filling. Use a splash of feta cheese on top before baking. The Mediterranean flavors bring brightness and a touch of brine that balances the richness.
Spicy Southern Kick
Incorporate a diced jalapeño or a teaspoon of cayenne pepper into the filling. Finish with a drizzle of hot sauce before serving. The heat adds a lively contrast to the creamy base, making it a crowd‑pleaser.
Vegan Victory
Replace chicken with sautéed mushrooms or lentils, use vegetable broth instead of chicken broth, and substitute heavy cream with coconut milk or cashew cream. The result is a hearty, plant‑based pot pie that still delivers on flavor.
Cheesy Crust Explosion
Fold shredded mozzarella or cheddar into the puff pastry before baking. The melted cheese creates a gooey, golden top that’s irresistible. Pair it with a sprinkle of paprika for a smoky finish.
Storing and Bringing It Back to Life
Fridge Storage
Cool the pot pie to room temperature, then cover tightly with aluminum foil or plastic wrap. Store in the refrigerator for up to 3 days. The crust may soften slightly, but the filling remains moist and flavorful.
Freezer Friendly
Wrap the cooled pot pie in plastic wrap, then place it in a freezer‑proof container or bag. Freeze for up to 3 months. Thaw overnight in the refrigerator before reheating.
Best Reheating Method
Preheat your oven to 350°F (175°C). Place the pot pie on a baking sheet and cover loosely with foil. Warm for 20–25 minutes, then remove the foil for the last 5 minutes to crisp the crust. Add a splash of water to the bottom of the pot before reheating; this steams the filling back to perfection.