It started with a burnt batch of vanilla bars that left a charred scent lingering in the kitchen for hours. I stared at the blackened edges, feeling the sting of disappointment and the sudden urge to redeem the evening. That moment was the spark that led me to reinvent the classic peanut‑caramel bar, turning a kitchen fiasco into a sweet triumph. I was determined to create a version that would make the whole house smell like a caramel‑peanut dream, and I knew it would be a game‑changer for anyone craving a decadent treat.
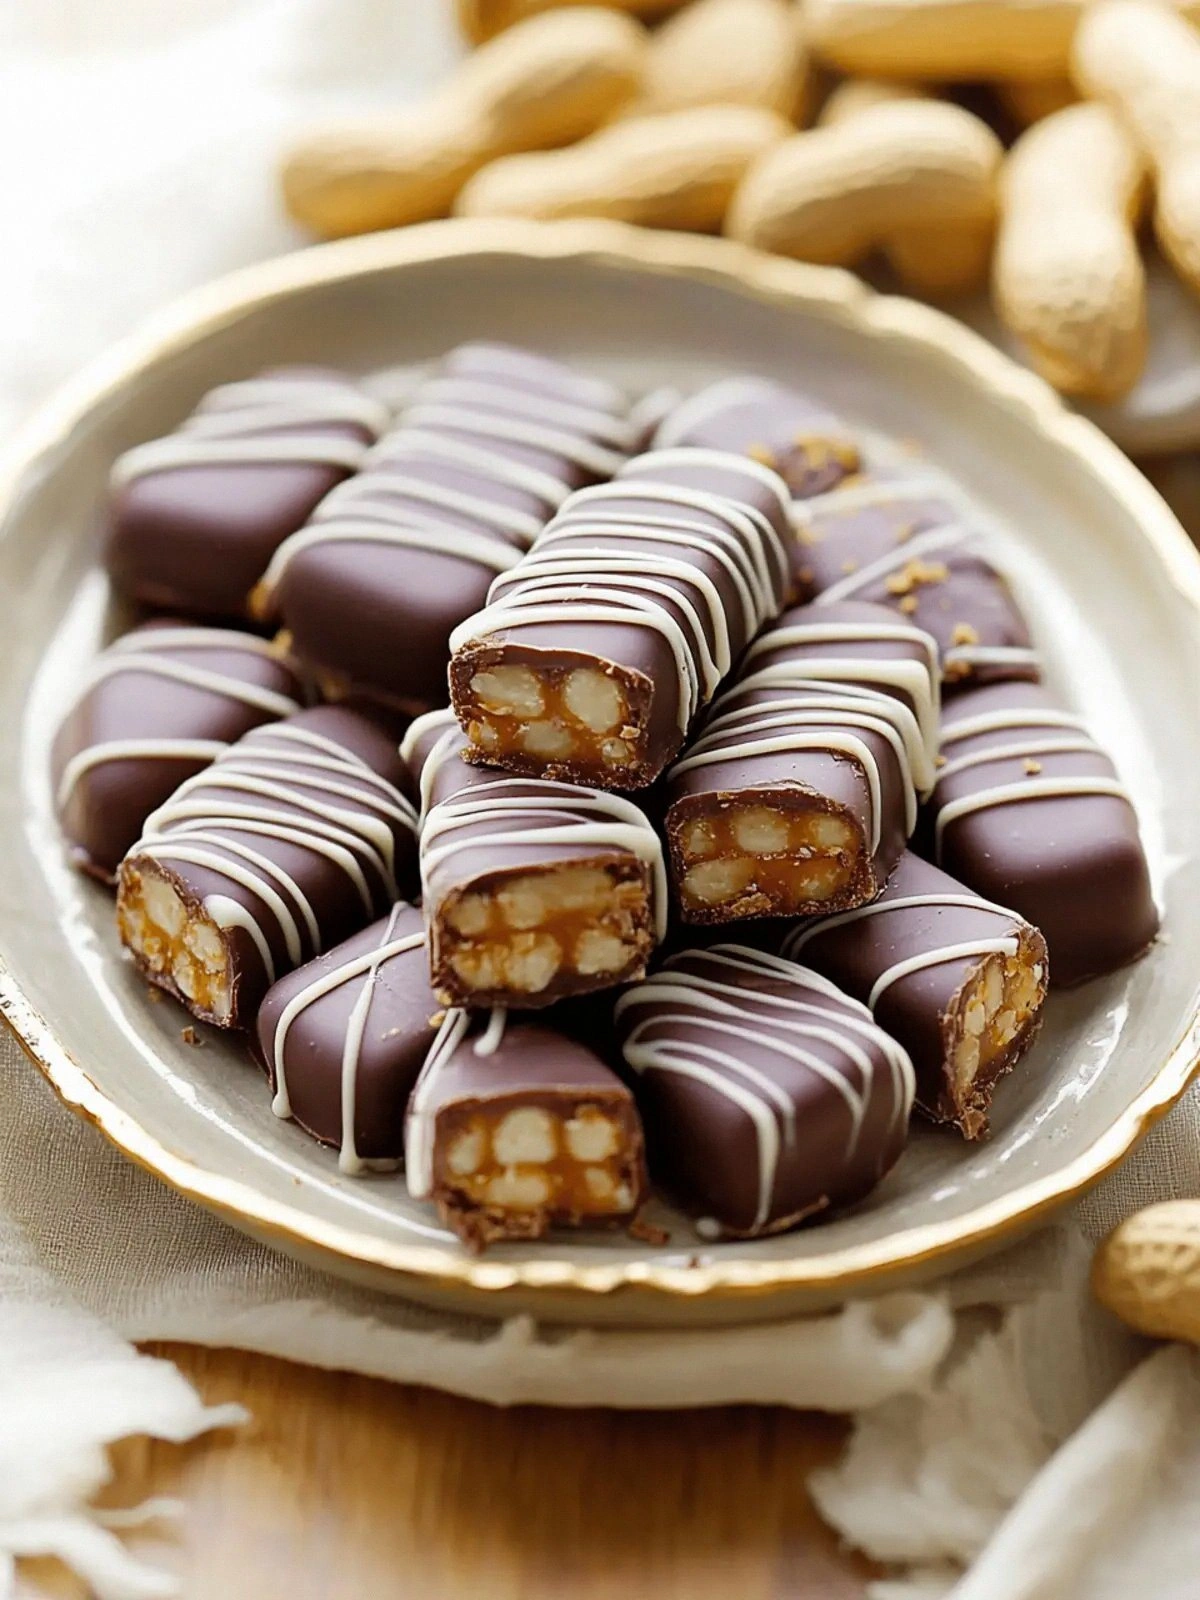
Picture this: a buttery crust that crackles under a glossy caramel glaze, the crunch of roasted peanuts dancing in every bite, and a ribbon of milk chocolate that melts like velvet on the tongue. The aroma alone—rich caramel, toasted tea biscuits, and warm chocolate—draws you in like a siren's call. When you take a bite, the crunch gives way to a silky caramel melt, followed by a subtle nutty finish that lingers long after the last crumb. The texture is a harmonious blend of crisp, gooey, and smooth, creating a sensory experience that feels both indulgent and comforting.
What sets this version apart is the meticulous balance of ingredients and techniques that elevate the flavor profile beyond the ordinary. I’ve combined the subtle earthiness of tea biscuits with the buttery richness of unsalted butter, while the caramel is cooked to a precise amber hue that delivers a deep, buttery sweetness without the bitterness of overcooking. The roasted peanuts are toasted just enough to release their oils, giving a buttery crunch that complements the silky caramel. Finally, a glossy milk chocolate coating seals the experience, adding a creamy, slightly bitter counterpoint that makes each bite feel like a luxurious finale.
And here’s the kicker: I’ll be honest—my friends begged me to taste the first batch before I could finish the whole tray. I dared you to taste this and not go back for seconds, and the verdict was unanimous: “Hands down the best version you'll ever make at home.” The secret sauce? A subtle pinch of sea salt that awakens the flavors and a splash of heavy cream that gives the caramel a silky finish. If you’ve ever struggled with balancing sweetness and texture in a caramel bar, you’re not alone—and I’ve got the fix. Picture yourself pulling this out of the oven, the whole kitchen smelling incredible, and knowing you just mastered a crowd‑pleaser that will have everyone asking for the recipe.
What Makes This Version Stand Out
- Taste: The caramel is cooked to a deep amber that offers a buttery sweetness balanced by a hint of nuttiness from the roasted peanuts. This depth of flavor sets it apart from the typical sugary caramel bars you find in stores.
- Texture: A crisp tea biscuit base provides a satisfying crunch that contrasts beautifully with the molten caramel and chocolate. The result is a multi‑textured bite that keeps you coming back for more.
- Ingredient Quality: Using premium, unsalted butter and high‑quality milk chocolate ensures each component shines. The quality of the base ingredients translates directly into a richer final product.
- Method Simplicity: Despite the indulgent result, the process is straightforward—no need for exotic tools or complicated techniques. A few precise steps and a little patience will do the trick.
- Make‑Ahead Potential: Once set, these bars can be stored in an airtight container for up to a week, making them an ideal make‑ahead dessert for parties or last‑minute gifts.
- Crowd Reaction: I’ve had friends say the bars are “the closest thing to a chocolate‑peanut butter cookie” but with a caramel twist. The feedback is consistently rave, proving this version truly hits the sweet spot.
Inside the Ingredient List
The Flavor Base
Tea biscuits are the foundation of this recipe, providing a subtle, slightly floral base that doesn’t overpower the caramel. Their mild flavor acts as a neutral canvas, allowing the caramel and peanuts to shine. If you can’t find tea biscuits, a light‑toasted shortbread works as a suitable substitute, but the flavor profile will shift slightly toward buttery richness.
The Texture Crew
Unsalted butter is the secret to a silky, cohesive crust. It melts into the biscuit crumbs, binding them together and creating a tender bite. A small amount of heavy cream is added to the caramel to prevent it from becoming too thick or gritty. If you’re looking for a dairy‑free version, coconut cream can be used, but the final texture will be a touch more oily.
The Unexpected Star
Caramel is the star of the show, but its preparation is where the magic happens. Cooking it to the right temperature—around 115°C—ensures a smooth, glossy finish without bitterness. Skipping this step or overcooking will result in a burnt, acrid taste that ruins the delicate balance. The 225 g of caramel in this recipe is measured precisely to coat every crumb without overwhelming the palate.
The Final Flourish
Milk chocolate is used not just for flavor but for its glossy finish. When melted, it creates a smooth, protective layer that locks in moisture and caramel. The 200 g of chocolate are melted at a low temperature to preserve their creamy texture. If you prefer a darker, more intense chocolate, dark chocolate will work but will slightly alter the sweetness balance.
Everything's prepped? Good. Let's get into the real action...
The Method — Step by Step
- First, preheat your oven to 180°C (350°F) and line a 20 cm square baking dish with parchment paper. In a medium bowl, crush the tea biscuits into fine crumbs using a rolling pin or a food processor. Add the unsalted butter and mix until the crumbs are evenly coated. This creates a buttery, cohesive base that will hold the caramel beautifully.
- Spread the biscuit mixture evenly in the prepared dish, pressing firmly with the back of a spoon to form a tight layer. Bake for 8–10 minutes until the edges turn a light golden brown. The goal is a firm base that can support the caramel without becoming soggy.
- While the base is baking, melt the 225 g of caramel in a saucepan over medium heat, stirring constantly. When it reaches a deep amber hue, remove it from the heat and stir in the 60 g of heavy cream until smooth. This step is crucial: the cream softens the caramel, giving it a silky texture that coats the biscuits like velvet. Kitchen Hack: If the caramel thickens too quickly, add a splash of warm water to thin it out.
- Pour the caramel mixture over the warm biscuit base, spreading it evenly with a spatula. The caramel should sizzle lightly as it hits the hot crust—an audible sign that it’s the right temperature. Let it set for 5 minutes so it starts to firm up but remains pliable.
- Break the roasted peanuts into bite‑sized pieces and sprinkle them generously over the caramel. The peanuts will add a delightful crunch and a nutty counterpoint to the sweetness. Watch Out: Be careful not to crush the peanuts too finely, or they will lose their crunch and become oily.
- Melt the 200 g of milk chocolate in a double boiler or microwave, stirring every 20 seconds until smooth. Drizzle the melted chocolate over the peanut‑caramel layer, using a spoon to create swirls. The chocolate should set quickly, forming a glossy, protective coating that locks in moisture. Kitchen Hack: For a more pronounced chocolate flavor, let the chocolate cool slightly before drizzling to create a marbled effect.
- Return the dish to the oven and bake for an additional 8–10 minutes, just until the chocolate starts to crackle slightly and the caramel edges pull away from the parchment. The aroma during this step is irresistible—think caramelized sugar, toasted nuts, and chocolatey sweetness mingling in a fragrant cloud.
- Remove the bars from the oven and let them cool completely at room temperature. Once cooled, lift them out using the parchment paper and cut into squares with a hot knife for clean edges. Store in an airtight container at room temperature for up to a week, or refrigerate for longer shelf life.
That's it — you did it. But hold on, I've got a few more tricks that'll take this to another level...
Insider Tricks for Flawless Results
The Temperature Rule Nobody Follows
Caramel is notoriously fickle, and the difference between a silky glaze and a burnt mess is just a few degrees. Use a candy thermometer and keep the heat low, aiming for 115°C. If the sugar starts to brown too quickly, reduce the heat immediately; the sugar will continue to cook even after you remove it from the flame.
Why Your Nose Knows Best
Before you add the heavy cream, inhale the caramel’s aroma. A sweet, buttery scent signals the right stage—just before it begins to darken. If it smells overly smoky, it’s already past its prime. Trust your nose; it’s the quickest way to avoid a caramel disaster.
The 5‑Minute Rest That Changes Everything
After pouring the caramel over the biscuits, let it sit for exactly five minutes. This brief pause allows the caramel to set slightly, creating a firm yet pliable surface that holds the peanuts in place. Skipping this step often leads to uneven peanut distribution.
Keep the Chocolate Moist
When melting chocolate, add a teaspoon of oil or a small amount of heavy cream to keep it glossy and prevent it from seizing. This trick ensures a smooth, shiny finish that’s as visually appealing as it is delicious.
Use a Hot Knife for Clean Cuts
Heat your knife in hot water and dry it before cutting the bars. A hot blade slices through the chocolate without pulling it, giving you clean, professional‑looking squares.
Creative Twists and Variations
This recipe is a playground. Here are some of my favorite ways to switch things up:
Chocolate‑Infused Peanut Butter Swirl
Replace the milk chocolate with a scoop of creamy peanut butter before drizzling. The result is a luscious, nutty swirl that adds a second layer of flavor for peanut lovers.
Sea Salt Caramel Crunch
Add a pinch of flaky sea salt to the caramel before pouring it over the biscuits. The salt enhances the sweetness and gives the bars a sophisticated, gourmet edge.
Almond & Honey Variant
Swap the roasted peanuts for toasted almonds and drizzle a light honey glaze over the top. This version offers a lighter, floral sweetness that pairs beautifully with the caramel.
Espresso‑Infused Caramel
Stir a tablespoon of finely ground espresso into the caramel while it simmers. The coffee adds depth and a subtle bitterness that balances the caramel’s sweetness.
Vegan Delight
Use coconut butter instead of unsalted butter, coconut cream instead of heavy cream, and a dairy‑free chocolate. The result is a silky, plant‑based bar that still delivers that indulgent crunch.
Storing and Bringing It Back to Life
Fridge Storage
Wrap the bars tightly in plastic wrap and store them in the refrigerator for up to two weeks. The cold environment keeps the chocolate firm and prevents the caramel from becoming sticky.
Freezer Friendly
Place the bars in a freezer‑safe container or zip‑lock bag, pressing out excess air. They can be frozen for up to three months. When ready to enjoy, thaw at room temperature for 30 minutes before serving.
Best Reheating Method
To revive frozen or refrigerated bars, place them on a parchment‑lined tray and warm them in a 160°C oven for 5–7 minutes. Add a tiny splash of water to the caramel layer before reheating; this steams it back to a silky, glossy finish.